Imagine glancing out your window, expecting to see a lush, green lawn, only to find patches bare from birds treating your grass seed as their personal buffet. The battle between backyard enthusiasts and feathered visitors is a tale as old as time. Bird-resistant grass seed might sound like a modern-day fairy tale solution for those who love their lawns almost as much as they love wildlife – but prefer the two to remain separate.
Gardening and lawn care often become exercises in patience, particularly when facing the dilemma of birds swooping down and snatching away freshly sown seeds. Such interference not only compromises the aesthetic value of your lawn but also increases maintenance costs and effort. Understanding whether there truly is a bird-resistant variety of grass seed is a matter of both botanical science and consumer savvy.
This article explores the myth and reality behind bird-resistant grass seed, examines the gravity of the issue, identifies some of the best products available, and shares essential tips to help you keep birds at bay. Join us as we take a closer look at whether this innovative solution can deliver a bird-proof blanket of green to your garden.
Can you get bird resistant grass seed?
Creating a lush, green lawn is a common goal for homeowners and garden enthusiasts, but it can be a challenging one when birds view freshly sown grass seeds as an irresistible buffet. However, those seeking bird-resistant grass seed in the UK will encounter a significant challenge: the sales of seeds treated with bird-deterring agents are not permitted, emphasising the importance of safe and environmentally friendly practices. In other words there is no such thing as grass seed treated with bird repelant.
While various methods have been experimented with, such as dyeing seeds to make them less appealing, these tactics have proven to be both ineffective and uneconomical. As a result, gardeners need to explore alternative methods for protecting their seeds from hungry birds.
Instead of searching for chemically treated seeds, consider employing physical barriers such as garden fleece or netting to cover the seeded area, thus preventing birds from accessing the seeds. Noise deterrents that mimic predator calls, along with fake birds of prey or reflective objects, can sometimes be effective in discouraging birds without causing harm. By doing so, not only can one promote seed germination for a healthy lawn but also coexist harmoniously with the surrounding wildlife.
There are grass seed mixtures to deter birds available, but these are for airports. These maixtures create a spike sward that birds will not nest or land in.
In summary, while bird-resistant grass seed is not an available product in the UK market, adopting strategic, bird-friendly deterrents can help ensure a successful and flourishing lawn.
Do birds actually take much seed?
Birds may appear to be a concern for gardeners when sowing grass seeds, yet they typically do not deplete seed supplies significantly. While it’s possible to observe birds picking at the freshly sown seeds, the impact on seed germination and lawn coverage is minimal.
In reality, a single gram of a common grass seed mix contains approximately 1,000 seeds. When applied at the recommended rate of 35 grams per square meter, each meter squared of your garden will be abundant with about 35,000 seeds. As long as the seeds are properly sown and mixed into the top 10 to 15mm of the soil, there’s more than enough to ensure a healthy lawn despite the occasional peckish bird.
Here’s a quick overview:
- Seeds per gram: ~1000
- Sowing rate: 35 grams/m²
- Total seeds per m²: ~35,000
- Required soil incorporation depth: 10-15mm
With these figures in mind, it’s clear that birds feeding on some seeds should not present a real obstacle to achieving a lush, green lawn. Therefore, it may not be necessary to use bird-resistant grass seed or invest in expensive bird deterrents for your garden.
Best bird resistant grass seed?
When searching for bird-resistant grass seed, the key is to select varieties that establish quickly, reducing the window that seeds are vulnerable to our feathered friends. Perennial ryegrass is a top choice due to its rapid germination rate, swiftly covering the ground and deterring birds from feasting on freshly sown seeds.
However, exercise caution when encountering products labeled as “bird-repellent grass seed.” Complete resistance to bird predation is not realistic, and such claims may be misleading. If you’re aiming for a seed mixture that deters birds after establishment, particularly in areas like airports where wildlife hazards can be significant, consider mixtures containing tall fescue. This grass variety grows spiky and dense, discouraging birds from making it their landing zone or nesting site.
Remember that while certain seed mixtures may reduce the appeal to birds, creating a bird-unfriendly environment comes with ecological considerations. Balance is key in maintaining a healthy ecosystem and a beautiful lawn.
Effective methods to prevent birds from eating fresh grass seeds also include physical barriers such as garden fleece, or employing bird deterrents like reflective objects or noise deterrents mimicking predatory birds. Visit your garden centre for suitable options to protect your expensive seed bed and ensure ideal conditions for seed germination.
Tips for keeping birds off your seed
Keeping birds away from freshly sown grass seed can be a challenge, but with the right strategies, you can protect your seeds and encourage a healthy lawn. Here are some effective methods:
Bird-Resistant Sowing:
- Incorporate Seeds: Ensure the bird-repellent grass seed is well integrated into the soil. Mix the seeds into the top 15mm layer of soil to prevent birds from spotting and picking them from the surface.
- Timing is Key: Sow your seed when conditions favor quick seed germination—typically in warm months from April to September when soil temperatures are higher. See our article on when to sow grass seed.
Bird Deterrent Tactics:
- Garden Centre Solutions: Invest in physical barriers or noise deterrents sold at garden centres designed to keep persistent birds at bay.
- DIY Approach: Place a carrier bag on a stick near the seed bed. Its movements and sounds can effectively scare off ground-feeding birds.
By following these tips and using effective methods, such as covering with a thin layer of soil or using reflective objects, you can protect your investment from hungry birds and ensure your fresh grass seeds thrive under ideal conditions. Remember, deterring pesky birds is key to successful seed germination and the development of rye grasses and other preferred types of seeds for a lush, bird-resistant lawn.
As the sun graces us with its warm gase, our lawns become the canvas for outdoor summer memories. Yet, the very intensity that brings life to our picnics and play can stress our verdant carpets. To keep your lawn lush and inviting as temperatures climb, a shift in your summer lawn care routine is essential.
Raising the height of your mower blades can shield grass roots from the blazing sun, conserving moisture and avoiding scorches. Just as humans thirst in the heat, your lawn’s hydration needs peak, making mindful watering more than just sprinkling—it’s a lifeline. Foot traffic under the relentless midday sun can stress grass; waiting for cooler times can spare your lawn from the consequence of compaction and wear.
This article will unveil a treasure troph of summer lawn care tips, ensuring your grass stays resilient and vibrant. Embracing these practices can prevent damage during droughts, avoiding the use of fertilisers and weedkillers that can harm more than help when the mercury soars. Read on to transform your summer lawn care routine from a task to a triumph even as the summer sun blazes.
Raise the height of cut
During the sweltering summer months, one significant adjustment to your summer lawn care regimen can lead to a healthier, green lawn—raising the cutting height of your mower. A taller grass blade of around 5-10cm is key in shielding your lawn from the harsh aspects of summer heat. It’s all about boosting drought resistance and maintaining that picture-perfect green.
Elevating your mower blade encourages a multitude of benefits. Firstly, it shades the soil, which in turn lessens water evaporation, allowing the lawn to retain much-needed moisture. Additionally, a longer lawn promotes deeper root development. Deeper roots are paramount for sourcing water from further below the lawn surface, giving your lawn better resilience in dry conditions.
While regular lawn mowing is typically recommended, during periods of intense summer weather, it’s advisable to let your lawn grow longer to avoid stress and damage to the lawn. When a summer drought strikes, and growth stalls, it’s best to put the mower away to avoid inflicting harm on your lawn.
Here’s a quick reference table:
|
Mower Blade Height |
Benefits |
|---|---|
|
5-10cm |
Less browning, retains moisture, encourages deeper roots |
Remember, a little height during the summer can mean the difference between a parched, stressed lawn and a lush, resilient one. Keep those blades taller for the perfect growth conditions that beat the summer blaze.
Apply water as needed
Maintaining a green lawn during the summer months demands attention to watering practices. The goal is deep, infrequent watering that encourages deeper roots, key to a healthy lawn in a hot summer. Although new lawns might need more regular watering as they establish, it’s vital to avoid excess. Overwatering can be as damaging as summer drought conditions.
For best results, water your lawn in the early morning, ideally between 8 am and 10 am during the summer. This timing minimises water loss due to evaporation and maximises moisture absorption. A thoroughly aerated lawn will have better water penetration and root reach. If you’re unsure about when to water, a simple check is to step on the lawn; if it doesn’t spring back, it’s time to water.
To strike that perfect balance, aim to water every 2-3 days, or roughly three times a week. This summer lawn care routine keeps the roots sufficiently hydrated without the risk of overwatering. Consider using a lawn sprinkler for even distribution, ensuring each blade gets its fair share of moisture. Following these steps will help you navigate through the heat of summer, maintaining a beautiful lawn that thrives even under the sun’s relentless gaze.
|
Watering Schedule |
Frequency |
Best Time |
|---|---|---|
|
Regularly |
8 am – 10 am |
|
|
Established Lawns |
3-4 days |
8 am – 10 am |
- Use a lawn sprinkler for even coverage.
- Only water when necessary—step test can guide you.
- Aerate for better water absorption.
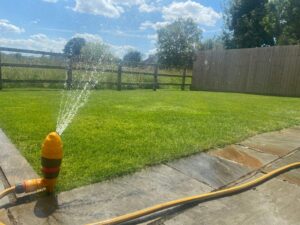
Summer lawn care: A lawn sprinkler will help to give an even application of water accross your lawn.
Try to keep off it during the heat of the day
As the mercury rises in summer, our lawns can feel the impact of extreme heat. Keeping a lush, green lawn during these warmer months requires careful consideration, particularly when it comes to foot traffic.
During peak temperature hours, it’s best to minimise walking or playing on the grass. High temperatures can amplify the stress on your lawn, and additional pressure from foot traffic can cause further damage. The grass blades are more prone to break which can hinder growth and health.
By staying off the lawn during the hottest parts of the day, you give your grass a chance to recover and thrive despite the summer heat. Think of it as giving your lawn a much-needed respite to maintain its vibrancy and resilience.
Remember, the key to a healthy summer lawn is not just in watering and mowing, but also in allowing it time to breathe and recuperate from the intense summer conditions.
Here’s a simple reminder:
- Avoid lawn activity during peak heat hours.
- Walking on hot grass can lead to damage and soil compaction.
- Give your lawn time to recover from the summer stress for a beautiful, healthy yard.
Do not apply fertiliser during very hot and dry periods
Dealing with the sweltering summer heat is challenging enough for us, and our lawns feel the pressure just as much. During these periods of intense heat and often drought conditions, it’s crucial to adjust our summer lawn care approach to avoid adding stress to our already parched green spaces.
When the mercury soars, it’s tempting to think fertilising your lawn might give it a boost. However, this is a common misconception and can actually lead to more harm than good. During peak heat and dry weather, the grass is in a state of stress, conserving energy and resources to survive. Adding fertiliser in these conditions can scorch the grass, creating an undesirable effect opposite to the lush, healthy lawn we covet.
It’s crucial to resist fertilising in the heart of summer as the compounds in fertilisers, which are usually beneficial, can increase the risk of burn during these sensitive times. Additionally, with limited water availability, the nutrients in fertilizers may not distribute evenly, leading to patchy growth or even further dehydration of the grass.
Summer Lawn Fertilisation: Proceed with Caution
- When to avoid: Top heat of summer, during drought
- Why avoid: Risk of scorching, increased stress on grass
- Alternative care: Light watering, mowing high for shade
In conclusion, pause the fertiliser application when your lawn is baking in extreme summer heat. This restraint, coupled with other summer lawn care practices tailored for hot weather, will help ensure your lawn remains a resilient and beautiful oasis despite the season’s challenges. See our fertiliser application guide for more information.
Do not apply weedkiller during very hot and dry periods
When the summer months roll around, bringing with them the intense heat of the season, lawn maintenance requires a deft hand and careful planning. It’s crucial to be aware of how dry weather and extreme heat can impact the application of weed treatments. During very hot and dry periods, applying weed killer should be approached with caution.
The stress on your grass during periods of drought and extreme summer heat can leave it more susceptible to damage, which is why spot-treating individual weeds is often the preferred method. This targeted approach, using a selective weed killer, helps ensure that the surrounding healthy lawn isn’t affected.
Here’s a quick guide to help you maintain a green lawn without the risk of damage from weed treatments:
|
Situation |
Recommended Action |
|---|---|
|
General Weed Treatment |
Avoid during hot and dry conditions |
|
Spot Treatment for Weeds |
Remove by hand |
|
Lawn Stress from Heat |
Do not treat to prevent damage |
When your lawn is battling the summer heat, remember that careful weed management helps foster perfect growth conditions for a beautiful lawn. It’s better to wait for a break in the heat or a cooler spell before applying more general weed treatments. This way, your lawn can not only survive but thrive even in the throes of a scorching summer.
If you are looking to sow a new lawn with grass seed in the summer, check out our Summer Grass Seeding article.
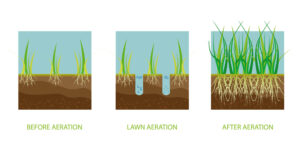
Do I need to aerate my lawn? Not always, but sometimes it can be a big help. Imagine stepping out to a lush, vibrant lawn that’s the envy of the neighborhood. This can be your reality with the simple yet profound practice of lawn aeration. Lawn aeration is a critical component of lawn care that ensures the health and beauty of your grass by addressing soil compacity and promoting the free flow of air, water, and nutrients.
Understandably, to the untrained eye, your lawn may simply look like a plot of grass, but beneath the surface lies a complex ecosystem where the roots of your turf battle against soil compaction. Aeration breathes life into this hidden battlefield, providing a path for essentials to reach the roots and invigorate your lawn.
As we delve into “The Ultimate Guide to Lawn Aeration: Tips and Tricks for a Healthy Lawn,” we will explore why aeration is central to lawn vitality, when the best time is to aerate, and how to achieve the best results. We’ll guide you through the aeration process step by providing aftercare and maintenance tips for prolonged lawn health. Prepare to become the master of your verdant domain with the knowledge that follows.
Why is Lawn Aeration Important?
A lush, vibrant lawn is the hallmark of a well-maintained yard. But achieving that picturesque green space involves much more than regular watering and mowing. One crucial aspect of lawn care that is often overlooked is the process of aeration. This method directly addresses an unseen problem that can hinder the health of your turf: soil compaction. Compaction occurs when the particles in the soil are pressed tightly together, reducing the space between them. This compaction can severely limit the flow of nutrients, water, and oxygen to the grass roots, preventing them from establishing a robust and healthy growth pattern. By aerating your lawn, you effectively break through this compaction, enhancing the root system and revitalizing your lawn’s health and appearance.
Understanding Soil Compaction and Its Impact on Lawn Health
The foundational health of any lawn begins beneath the surface, within the unseen environment of the grass roots. With time and activity, especially in areas of heavy foot traffic or with heavy clay soils, lawns can suffer from soil compaction. This dense layer restricts the flow of essential elements such as oxygen, water, and nutrients, which grass roots need to thrive. The symptoms of compacted soil may not always be immediately apparent, but indicators include poor drainage, leading to water logging, and difficulty in maintaining a lush green appearance. The resilience of a lawn is also compromised as reduced root growth leaves it vulnerable to various stresses, such as heat waves and drought conditions. Regular aeration can suffice to alleviate these issues and is particularly vital for lawns with clay soils or where there is frequent foot traffic.
The Benefits of Aerating Your Lawn
The advantages of lawn aeration are numerous and contribute significantly to the vitality of your lawn. Below are some key benefits:
- Nutrient Uptake Enhancement: Aerating your lawn creates pathways for air, water, and nutrients to reach the root zone where they are most needed. This process enriches the roots and encourages healthier grass growth.
- Improved Water Absorption: Post aeration, soil is better able to absorb and retain water, reducing the problems of runoff and puddling.
- Water Conservation: Aerated lawns use water more efficiently, meaning they require less frequent watering, thus conserving water and reducing your irrigation bill.
- Root Growth: Compacted soil impairs root development; aeration facilitates deeper and stronger root growth, which is integral to the health and resilience of your lawn.
- Heat and Drought Resistance: With improved root systems and better water retention, your lawn is better prepared to endure the stresses of heat waves and drought periods.
In summary, aeration is not just a beneficial lawn care technique, but a necessary one for maintaining a strong, vibrant, and healthy lawn. Investing time in aeration can save a lot of effort in lawn maintenance in the long run while ensuring that your grass remains resilient against environmental stresses.
When to Aerate Your Lawn
Finding the right time to aerate your lawn is critical in optimizing the health and appearance of your grass. Ideally, the perfect time to aerate is during the lawn’s growing season, either in late spring or during the autumn months. This timing allows your grass to heal and fill in any open areas after the aeration process, ensuring a lush and robust lawn. It is advised to avoid aerating during the peak summer heat, as the added stress can challenge your lawn’s ability to recover.
Considerations Based on Soil Type
Different soil types may necessitate varying aeration schedules. Heavy clay soil, known for its tendency to compact easily, often requires more frequent aeration to alleviate issues that affect water and nutrient absorption. In such cases, core aeration, which removes plugs of soil, is the preferred method as it effectively combats compaction and promotes essential elements reaching the roots. On the other hand, sandy or loamy soils are less prone to compaction and may benefit from less frequent aeration, typically every other year.
Identifying Signs of Soil Compaction
Recognizing the signs of soil compaction is imperative to maintaining a healthy lawn. Compacted soil can manifest itself through pooled water on the surface, shallow grass roots, slow growth, reduced tillering, yellowing of leaf blades, and a general thinning out of the grass. The appearance of certain weeds, such as ribwort plantain or daisies, can also be an indicator of compacted soil. Physically, compacted soil may feel hard to the touch, and it may cause the lawn to feel spongy and dry out quickly. If water puddles rather than being absorbed during rainstorms or if the grass is withering and losing its vibrant color, it’s likely time to consider aeration.
Determining the Best Time for Aeration Based on Grass Growth
The type of grass you have also influences the best time to aerate. Cool-season grasses are best aerated in early fall or early spring, coinciding with their most active growth phase. For warm-season grasses, late spring or early summer, right before they enter their peak growing season, is the opportune time. Aerating while the grass is actively growing ensures quick recovery. Autumn aeration is particularly beneficial as it combines active grass growth, lower temperatures, less weed competition, and the upcoming rest period during winter, allowing your grass to recuperate and strengthen. Remember though, aeration is not recommended during the winter when grass is dormant nor immediately after prolonged periods of cold or wet weather that can hinder grass recovery.
Methods of Lawn Aeration
A healthy lawn not only beautifies your home but also benefits the environment. However, soil compaction can prevent grass roots from absorbing necessary air, water, and nutrients. To mitigate this, aeration is a crucial step in lawn care. There are several methods available, each suited to different conditions and requiring varied levels of effort.
Core Aeration: An Effective and Common Method
When dealing with compacted soil, especially those that are heavy in clay, core aeration is considered the most effective aeration method. Core aerators are equipped with hollow tines that are mechanically driven into the lawn, removing small plugs of soil typically 2 to 4 inches deep and about 0.5 to 0.75 inches in diameter. These plugs are usually extracted at intervals of 2 to 3 inches apart. By doing this, core aeration not only immediately alleviates compaction but also facilitates the delivery of air, fertilizer, and water to the roots, promoting a healthier lawn.
Plug Aerators: Enhancing Aeration with Soil Plugs
Plug aerators operate on a similar principle to core aerators, utilizing hollow tines to remove plugs of soil and leaving holes in your lawn. Lawn care professionals often prefer this method as it results in deeper, more beneficial changes to soil structure. The plugs left atop the lawn by plug aerators decompose gradually, returning nutrients to the ecosystem. This method not only improves the influx of vital elements to the grass roots but also avoids further compaction of the soil around the holes, which can be a risk with other aeration techniques.
Spike Aerators: A Quick and Easy Alternative
For those with sandy or loamy soils, or smaller lawn areas, spike aerators might be a suitable choice. These tools operate by punching holes into the soil with spikes, rather than removing plugs of soil. Spike aerators are less labor-intensive than plug aerators and provide a simple solution for homeowners to increase air exchange within the soil. However, they may not be suitable for all soil types, particularly heavy clay soils, as they can potentially create more compaction around the holes.
Hollow Tines vs. Garden Fork: Choosing the Right Tool for Your Lawn
When it comes to manual aeration options, choosing between a hollow tine aerator and a garden fork depends on your lawn size and the severity of compaction. Hollow tine aerators extract soil cores efficiently for deep aeration and are ideal for lawns with severe compaction. Garden forks, meanwhile, can be manually pushed and wriggled into the turf to break up compacted soil. They are often recommended for smaller or lightly compacted lawn areas. While both tools address compaction issues, hollow tines specialize in removing soil cores to optimize root zone conditions for a more resilient and healthy lawn growth.
In conclusion, selecting the suitable aeration method hinges on your lawn’s specific condition, soil type, and size. While power-driven aerators like core and plug aerators offer a thorough solution against compaction, simpler tools like spike aerators and garden forks provide flexibility to homeowners who prefer a more hands-on approach for smaller tasks.
How to Prepare Your Lawn for Aeration
Preparing your lawn for aeration is a critical step in ensuring that the aeration process is as effective as possible. The goal is to create optimal conditions where the aeration equipment can reach the soil and roots effectively, enabling your lawn to reap the full benefits of this important lawn care practice.
Clearing the Lawn of Debris and Dead Grass
A thicker thatch layer, which is a buildup of dead organic matter such as leaves and grass clippings, can be detrimental to your lawn’s health. It obstructs light, water, and nutrient absorption, which can lead to a less vibrant and resilient turf.
Aeration plays a critical role in thatch management. By reducing soil compaction through aeration, you enhance the lawn’s drainage and encourage microbial activity, which in turn helps decompose thatch. Core aeration, in particular, removes small plugs of soil from your lawn, which not only improves oxygen, nutrient, and water penetration but can also alleviate much of the thatch problem.
Before aerating, remove large pieces of debris and dead grass. This simplifies the process and ensures that the lawn is well-prepared for the aeration equipment, allowing it to operate at maximum efficiency without blockages.
Ensuring Proper Watering Before Aeration
Ensuring the soil is adequately moist before aeration is essential. An easy rule of thumb is to aerate the day following a rain shower, or alternatively, water the lawn yourself the day before aeration. The soil should be damp but not soaked, which makes it easier for the aeration machine to penetrate and effectively relieve compaction.
A well-watered lawn ensures a softer ground, giving you a better chance of removing more significant soil plugs and achieving greater depth with each aeration pass. However, be careful not to overwater, as this can make the ground too muddy and potentially hinder the aeration equipment.
It’s also crucial to mark any sprinkler heads or shallow utility lines you may have in your yard. This helps prevent damaging these structures during aeration, saving you from the headache of repairs. By following these preparation steps, you set the stage for a smooth aeration process and pave the way towards a healthier, more vibrant lawn.
The Aeration Process Step by Step
Lawn aeration is a pivotal practice offering a breath of fresh air to your hardworking turf. This task might seem daunting at first, but fear not—we’ll walk you through it step by step. By allowing air, water, and vital nutrients to reach the roots, we combat soil compaction, a notorious barrier to a healthy lawn.
Step 1: Marking Sprinkler Heads and Other Obstacles
Prior to unleashing your aerator on the lawn, embark on a treasure hunt of sorts—flagging sprinkler heads, shallow utility lines, or other subsurface impediments. A kiss between an aerator and a sprinkler head or an electrical line is no love story; it’s a prelude to an unplanned and often expensive repair. Carefully mapping and marking these hidden dangers is crucial. Sprinkler heads tend to lurk right below the terrain’s crest, vulnerable to the aerator’s advances. Tag each with a small flag or a visible marker to avoid any undesirable encounters. Accidents can lead to service disruptions or, worse, safety hazards. The extra minutes spent on this task could save you not just money but peace of mayhem-free mind.
If aerating a lawn in the shade, watch out for tree roots as these can easily be damaged and can damage aeration machinery.
Step 2: Adjusting Aeration Depth for Soil Type
Aeration depth is not a “one size fits all” affair. The golden rule with core or plug aerators is to aim for 2 to 3 inches, deep enough to bypass that tenacious thatch layer, yet not so aggressive as to traumatize your turf. This kind of precision encourages a deeper root system and fosters a resilient, lush lawn. Remember, different soil types may warrant subtle adjustments to this guideline. For example, clay soil, more prone to compaction, might benefit from these full 3 inches, while a lighter soil may not need quite as much. Adjust your aerator accordingly, and remember, this step isn’t about depth alone—it’s about promoting a habitat where your grass can flourish.
Step 3: Performing Core Aeration or Using Plug/Spike Aerators
Now comes the action—core aeration vs. plug or spike aeration. If you’re pursuing the core aeration route, you’ll be removing small cylinders of dirt, allowing for de-compaction and room for expansion. Precisely-spaced holes every 8-10 cm maximize the benefit. Some situations call for a double pass, especially in heavily compacted areas. For smaller yards or those minimalists among us, spike aerators or even aerator shoes might do the trick. However, beware—the delight of simplicity may be offset by increased soil pressure, potentially raising compaction woes.
For larger lawns with formidable compaction, core or plug aerators are the professionals’ choice. These machines professionally extract soil plugs, ensuring your turf’s access to the essentials—air, water, nutrients—are unhampered. Post-aeration, those holes left in your lawn are not for naught. They’re the foundation of a thriving sod, where roots run deep, and grass blades reach high—healthy, robust, and evergreen.
Aftercare and Maintenance
After your lawn has undergone the invigorating process of aeration, it enters a phase of recovery and revitalization. To bolster this progress, aftercare and maintenance are not merely recommendations—they’re imperative. Once the soil has been loosened and plugs have been removed, the next step is to nurture this newfound openness with the right amounts of nutrients and care. If applying grass seed, consider covering with a layer of soil.
Post-Aeration Fertilizing and Top Dressing
Directly following aeration, seize the opportunity to fertilize. This allows the nutrients to dive deep into the soil, reaching the grass roots more effectively than they would have pre-aeration, thus promoting vigorous growth. A top dressing of soil or compost can further enhance this renewal by smoothing out the lawn and filling in the holes, making for an even spread of organic matter. Covering any seed with a thin layer of soil will help with germination.
Routine Lawn Care
Maintain your usual mowing and watering schedule, ensuring that you’re not cutting the grass too short—this can stress the newly aerated lawn. Instead, aim for a height that supports healthy grass and deep roots. Watering should be light yet frequent in the days following aeration, particularly if you’ve overseeded. This keeps the seeds from drying out and encourages germination, allowing your lawn to become dense, lush, and beautifully green.
Irrigation Schedule
Strive for about an inch of water per week, keeping in mind rainwater contribution. This level of hydration should prevent your lawn from drying out without over-saturating it. Keep the soil moist but not overly wet. If the surface gets too wet it can encourage turf diseases like furarium patch.
Dealing with the Thatch Layer After Aeration
The thatch layer—the intertwined mat of roots, stems, and leaves—can be your lawn’s worst enemy if it becomes too thick. Not only does it create a barrier to essential nutrients, but it also restricts water and air circulation. Aeration can help reduce or even prepare the thatch layer for more specialized dethatching treatments.
Breaking Down Thatch Post-Aeration
With aeration complete, it’s the perfect moment to break down any remaining thatch. Specialized products can assist in its decomposition, whereas natural processes are also encouraged by the improved soil conditions.
Thatch Thickness Check
In case your thatachable culprit exceeds 1/2 inch in thickness, you’ll want to perform dethatching to reduce this layer, complementing the aeration process and ensuring your grass gets all the nutrients it craves.
Seeding and Fertilizing for Optimal Results
In the aftermath of aeration, seeding and fertilizing your lawn can yield tremendous benefits. Indeed, aeration has set the stage for optimal seed-to-soil contact and nutrient absorption.
Soil Amendments
When appropriate, use lime to alleviate acidic soil conditions or gypsum to break down heavy clay soils. Each amendment aids the soil in achieving its ideal structure and pH balance—a crucial factor for robust grass growth.
Seed and Fertilize
Promptly apply grass seed and fertilize the lawn after aeration. This ensures that your seeds have the best chance to germinate, and the fertilizer can penetrate deeply, reaching the roots where it’s most needed. Remember to pick a seed blend suitable for your lawn’s specific conditions, be it sun exposure or foot traffic.
Regular Watering and Mowing Practices
Following aeration, maintain a regular watering and mowing regimen tailored to aiding your lawn’s recovery.
Watering Routine
Keep the soil moderately moist by watering every two to three days, particularly after overseeding. This consistent schedule helps seeds to sprout and roots to grow deep, fortifying your turf for the future.
Scheduled Mowing
Do not neglect your mowing routine; a freshly aerated lawn still needs to be trimmed regularly. However, ensure that blades are sharp and mowing is done at a consistent and appropriate height to prevent undue stress on the grass.
By adhering to these aftercare strategies, your lawn will not only recover from aeration but will also leap towards greater health and vitality, ready to showcase its lushness.
Did you know that your lawn’s health and verdancy are largely dependent on how you wield your garden hose? The unassuming act of watering can make the difference between a lush green and a barren brown patch outside your window. Establishing a proper watering routine is not just about the amount of water used; it involves understanding the unique needs of your grass and the delicate balance of factors that contribute to a healthy lawn.
From the type of soil cradling the roots to the time of day when the sun kisses the blades, every element plays a crucial role in proper lawn hydration. Insufficient watering can lead to a weakened lawn, vulnerable to pests and diseases, while overwatering has its detriments, promoting fungus growth and a shallow root system.
Say goodbye to the guesswork and hello to a healthier lawn with our expert guide on the best practices for watering your lawn. Learn why adequate watering is vital, how to discern your lawn’s specific needs, and the most effective techniques to quench its thirst. Prepare to dive deep into the science of soil moisture, discover the optimal time for watering, and tailor your maintenance routine for the particular type of grass waving in your garden.
Always remember that in the summer there might be hosepipe bans put in place. The following link will give a list of any active hosepipe bans.
Why is Proper Watering Important for Your Lawn?
Watering your lawn is a task that should not be taken lightly, as it directly affects the health and vitality of your grass. Proper watering ensures that your soil remains moist, allowing grass seeds and established lawns to receive the necessary hydration for optimal growth. It’s crucial to strike a balance; while the lawn needs around 1 inch of water per week in the height of summer, overwatering can be just as detrimental as under-watering.
By watering deeply and infrequently, you encourage the roots of your grass to grow deeper into the soil, which enhances the lawn’s resilience during dry spells and improves its overall drought tolerance. Conversely, inadequate watering practices can leave grass susceptible to pests, diseases, and the consequences of a shallow root system. Establishing a proper watering schedule, considering factors like the time of day and soil type, can result in a lush and robust lawn that’s better equipped to handle the variances of climate and the rigors of use.
Effects of Insufficient Watering on Your Lawn
A lawn starved of adequate moisture can quickly show signs of distress. Without regular watering, the grass can become vulnerable to damage from pests, disease, and environmental stressors. Grass that’s watered daily may seem like a beneficial regimen, but this habit actually encourages the development of shallow roots – the result can be a weakened lawn that’s quick to dry out and struggle under the sun’s intense heat.
To sustain a robust lawn, watering about three times per week during the warmer months might be necessary, depending on your lawn’s needs and the local weather conditions. This typically provides about an inch of water each week. However, overdoing it can prompt fungus growth and soil compaction, hampering healthy grass development. On the other end of the spectrum, insufficient watering leads to drought stress, characterized by dry and cracked soil and grass that is brittle and unable to reach deeper moisture. By ensuring that water penetrates deep into the inch or so of soil, you’re empowering the roots to stretch further down, creating a more resilient lawn overall.
Understanding Your Lawn’s Watering Needs
Grasping the specific hydration requirements of your lawn is fundamental to nurturing a thriving green space. A healthy lawn demands approximately 1 to 1.5 inches of water weekly, whether it be through natural rainfall or manual irrigation. The rhythm of your watering routine is not static; it wavers with the seasons. Blistering, dry conditions could compel you to water more often, whereas a drop in temperatures signals a need to scale back to prevent overwatering.
Vigilance for telltale signs can keep your lawn in peak condition. The resilience of your grass, for instance, can be measured by its ability to spring back after being stepped on—footprints that linger are a call for hydration. Instruments like rain gauges and moisture meters come in handy, transforming the art of lawn care into a precise science. These tools measure moisture levels, enabling you to ensure the lawn is quenched just right, avoiding the pitfalls of over or under-watering. Remember, of all the elements of lawn care, effective watering has the most immense impact—a responsibility that should be managed with understanding and attention.
Factors to Consider for Determining Watering Needs
When considering your lawn’s watering regimen, a one-size-fits-all approach falls flat. Numerous elements influence the thirst of your turf. The composition of your soil, type of grass, exposure to sun and wind, and fertilization levels all play pivotal roles. Observing your lawn’s color shift to a drab hue or noticing footprints that seem to etch into the blade are nature’s calls for a drink.
Watering should be a deep root affair—surface sips lead to shallow roots, while a good soak fosters a strong foundation beneath. An adeptly fertilized lawn can bear the brunt of a parched period more resiliently, thus affecting the frequency needed for watering. Tools such as rain gauges and moisture meters are allies in your quest to maintain the fine balance between too much and too little, preventing waste and safeguarding against grass trauma.
Soil Type and Its Impact on Water Retention
The substrate your lawn calls home is a determining factor in water management. If your turf is bedded in sandy terrain, brace yourself for more frequent watering episodes—it’s a thirsty soil that lets moisture slip easily through its gritty fingers. Contrastingly, clay-heavy soil grasps water with a vice-like grip, raising the risk of the roots taking a prolonged soak which can lead to distress and disease.
Balanced soil, such as loam, is the yardstick for harmony in hydration—offering sufficient drainage yet preserving moisture to foster healthy root development. Appreciating the particular drain-and-retain characteristics of your soil type fortifies your ability to construct a watering schedule that catresses the unique needs of your grass, ensuring its vigor and verdure.
Best Time to Water Your Lawn
Understanding when to water your lawn can have a significant influence on maintaining its lush, green appearance and ensuring the health of its grass roots. To achieve the balance between efficient water use and a healthy lawn, the timing of watering is crucial.
The Ideal Time of Day to Water Your Lawn
To optimize your lawn care routine, the consensus among experts is to water your grass in the early morning, ideally between 6 a.m. and 10 a.m. This time frame strikes the perfect balance by allowing water to soak deeply into the soil, reaching the grass roots without the risk of excess evaporation from the midday sun. In addition, watering early allows grass blades enough time to dry before the evening, reducing the likelihood of fungal diseases which can thrive in moist, cool conditions overnight.
Avoiding Watering During the Hottest Hours
During the sweltering heat of a summer day, usually between 10 a.m. and 4 p.m., watering becomes less effective and eco-friendly. The sun’s intensity at this time causes water to evaporate too quickly from the soil surface before it can be utilized by grass roots. Additionally, water droplets on grass blades act like magnifying glasses, potentially scorching your grass during peak sunlight hours. Hence, evading this time frame is both a conservation effort and a protective measure for your lawn’s vitality.
Watering Your Lawn in the Evening: Pros and Cons
Although evening watering, specifically between 10 p.m. and 6 a.m., might seem like a clever way to conserve water and adhere to water restrictions, it comes with a downside. Nighttime temperatures drop, slowing the rate of evaporation. Consequently, water can linger on grass blades and soil, creating a conducive environment for fungal growth and lawn diseases. While it may seem beneficial to have the lawn absorb water overnight, the extended moisture can invite pests and lead to the development of unhealthy lawn conditions. The cons of evening watering often outweigh the pros, making it a less than ideal choice in most situations.
In summary, morning watering is most conducive to a thriving lawn. It aligns with the grass’s natural growth cycle, prevents wasteful evaporation, and limits the risk of disease. Always consider your local climate, soil type, and the type of grass you’re nurturing when creating your watering schedule. And during periods of extreme heat or unexpected dry spells, adjust your watering accordingly to ensure your lawn stays as resilient and green as possible.
Proper Watering Techniques for a Healthy Lawn
To cultivate a verdant, healthy lawn, mastering the proper watering techniques is essential. Providing your grass with 1 inch of water weekly is the key metric for hydration in the midle of summer—a balance that fosters deep root growth and ensures a robust green lawn. The ideal method for watering extensive lawn areas is using sprinklers that simulate a slow, soaking rain, granting water enough time to penetrate deeply into the soil without causing runoff. Overzealous watering should be avoided, as it can instigate shallow roots, promote diseases, and create a welcoming haven for pests. Adhering to these guidelines helps maintain an effervescent lawn without wasting water.
Using a lawn sprinkler will help to get an even applcation of water over the lawn.
Determine the Inches of Water Your Lawn Receives
To ensure your lawn is quenched with the correct amount of water, performing the screwdriver test is a practical method. Dive a screwdriver 6 to 7 inches deep into the turf. If it slides in easily, the roots are sufficiently hydrated. Additionally, you can employ rain gauges or empty containers to gauge your sprinkler’s water output—midway sprinkler spray area yields the most accuracy. Monitor your lawn’s response to watering, using a screwdriver to decipher the need for adjustments. Remember, symptoms of overwatering, such as yellowing grass and weed proliferation, may call for a reduction in watering frequency or duration.
Watering Frequency and Amount
The frequency and amount of watering your lawn requires are contingent upon various factors, including soil type, climate, and grass species. Over-watering promotes shallow root development and can render your lawn more susceptible to a plethora of maladies. Conversely, infrequent hydration may lead to dormancy or even grass death. Ideally, you should water deeply yet sparingly to foster a hardy, drought-resistant turf. Shallow, frequent watering is inefficient and costly. The aim is to find that sweet spot where your lawn stays hydrated without wasteful overindulgence in water.
Utilizing Rain Gauges to Monitor Rainfall and Adjusting Watering Schedule
Rain gauges serve as an invaluable tool for lawn maintenance, aiding in preventing over-watering by measuring the precipitation received. By simply placing a gauge within a sprinkler’s range, you can accurately quantify the water your lawn absorbs during irrigation. This measurement, alongside natural rainfall captured by the gauge, informs you of the need to adjust your watering regimen. It’s about striking the proper balance to maintain a flourishing lawn, using tools like rain gauges or even repurposed tuna cans to measure sprinkler output.
Watering Deeply to Promote Root Growth
Deep watering is indispensable for a healthy lawn—approximately 25 to 30 minutes of watering once or twice a week is generally sufficient. This practice nurtures deep-rooted grass, resilient against fluctuating environmental stressors. Avoid shallow watering, which can result in frail, surface-level roots prone to damage from heat, cold, and pests. Utilize collection methods, such as a timed reservoir, to ensure you’re reaching the recommended inch of water during each deep watering session.
Preventing Wasteful Evaporation through Watering Techniques
To evade needless evaporation, time your watering for the cool, early morning hours between 6 a.m. and 10 a.m. At this time, the cooler temperatures aid in water retention and decrease the chances of heat stress and disease afflicting your lawn. While watering overnight from 10 p.m. to 6 a.m. might suit water conservation efforts, avoid peak sunlight hours from midday to afternoon, as this can exacerbate grass stress and impede water absorption. Seasonally adjust your watering schedules, providing deeper, less frequent watering sessions to conserve and effectively manage our precious water resources.
Caring for Specific Grass Types
When it comes to achieving the coveted lush and vibrant lawn, understanding the particular needs of your grass type is critical. Cool-season grasses, like reygrass and fescue, thrive in climates with cold winters and mild summers. They typically require generous watering to maintain their color and vigor, especially as they can demand more hydration compared to their warm-season counterparts such as bermuda and zoysia. These warm-season varieties, conversely, perform best when the temperature soars above 80 degrees and generally manage to retain moisture more efficiently. This is the reason why they are used in southern Europe and
The fine texture of sandy soils, often located near water bodies such as rivers or the coast, presents a distinct challenge for grasses planted within. Such soils drain quickly and retain less moisture, necessitating frequent, lighter sessions of watering to keep the grass hydrated without over-saturating the turf. It is important to remain vigilant about the specific watering needs of your lawn, taking into account the combination of grass type, climate, and soil type to ensure your watering regimen promotes a thriving, healthy lawn without wasting this valuable resource.
Watering Tips for Cool-Season Grasses
Cool-season grasses like Kentucky bluegrass and fescue demand close attention to watering schedules. During the sweltering periods of late spring, the entirety of summer, and the onset of the fall season, these types of grass may require up to three waterings per week to retain their lush appearance and health. When the autumnal chill sets in, it is crucial for such grasses to receive adequate moisture to recover from any summer-related dormancy and prepare for the colder months ahead.
To flourish, cool-season grasses should receive 1 to 2 inches of water per week during hot spells. As the temperatures cool and the growing season nears its end, maintain a watering regimen that provides approximately an inch to an inch and a half of water weekly. During the peak summer months, alternating watering days—such as every other day—can help sustain the grass’s health and support a continuous dense, green coverage.
Grass Seed Selection and Watering Considerations
Selecting the right grass seed is a cornerstone of lawn care, with the watering needs closely tied to your choice. A healthy, green lawn requires about 1 to 2 inches of water per week, yet vigilance must be maintained to avoid the perils of overwatering, which could drown roots and foster fungal diseases. Equally, under-watering can weaken your turf and make it vulnerable to environmental stresses.
The prime time for watering grass is in the early morning hours, specifically between 6 a.m. and 10 a.m., to ensure peak water absorption and minimal evaporation. While hand watering can seem sufficient, it often leads to inconsistent distribution and may promote pooling or runoff. Instead, opt for sprinklers that deliver water akin to a gentle rain, evenly soaking the lawn for the best possible penetration and results.
In lawn care, knowledge and precision go hand in hand. By understanding your grass’s specific needs and how to effectively meet them, you pave the way for a flourishing lawn that’s as resilient as it is beautiful. The most drought tolerant grass specie is Tall Fescue, this grass is a ‘must have’ species if you want to keep a green lawn with minimal watering. Tall Fescue is used in our Drought Resistaint Grass Seed Mixture.
Maintaining Adequate Soil Moisture
Achieving proper hydration for your lawn is about striking a balance; it’s essential to provide enough water for sufficient soil moisture without overdoing it. The porous nature of sandy soil means that water can run through too rapidly, often necessitating over an inch of water weekly to maintain adequate moisture levels. Clay soil, conversely, may hold onto water too zealously, potentially resulting in root diseases as grass roots are averse to constant wetness. The loamy soil hits the sweet spot, thanks to its balanced organic matter content – it’s adept at retaining necessary moisture while permitting excess to drain away, avoiding the risk of a waterlogged lawn.
When managing your lawn’s moisture, it’s important to factor in the type of soil beneath your grass. Periodic and effective watering, tailored to the soil type, is better than a fixed schedule. The lawn’s condition serves as an indicator; signs of distress like drying and yellowing indicate the need for more water, while pooling water on the surface suggests you might be watering too much.
The Role of Soil in Water Retention
Healthy soil is a cornerstone for thriving grass, capable of providing excellent drainage while also preserving an optimal level of moisture at the root zone. The texture and composition of soil play a significant role in lawn care, particularly in the domain of watering. Soil types like sandy that quickly drain may command weekly waterings in excess of one inch to sustain lawn hydration. Conversely, clay soil’s retention properties can lead to overwatering woes, causing an unfavorable, waterlogged environment for grass roots. Loam is the goldilocks soil type for gardeners, offering a harmonious mixture of drainage and moisture retention, thanks in no small part to its organic compounds.
Being mindful of your soil’s unique attributes informs a more cultivated approach to watering. A regimen that complements your soil type is crucial, ensuring your grass is neither thirsty nor drowning, but rather, flourishing with just the right amount of moisture.
Something to remember is that shaded lawns may require more watering if there are tree roots presents becuase the tree roots will be sucking out water.
Preventing Shallow Root Growth through Proper Watering
One common misstep in lawn care is the tendency to over-water, which can lead to shallow root systems, leaving the lawn vulnerable to diseases and less resilient during dry spells. Under-watering carries its hazards too, potentially sending your grass into dormancy or worse, death. The recommended practice for a robust root system and enhanced drought tolerance is to water deeply but infrequently. This encourages roots to grow deeper into the soil in search of moisture, making them more resistant to environmental stress.
Daily watering is a no-go; it fosters shallow rooting, forcing the grass into quick drought-related stress whenever watering is skipped. Instead, implementing deep watering sessions—about an inch of water once or twice a week—encourages a hardier, more drought-tolerant lawn. Coupling this with pre-summer fertilization and nutrient application can provide the additional boost needed for your lawn to thrive, even when watering is sparser during hot, dry conditions.
As the sun casts its warm glow across your garden, you might wonder if the golden rays are a signal to start sowing new life into your lawn. Summer, with its long days of sunshine, often prompts questions about the feasibility of planting grass seed during its peak months – can I sow grass seed in the summer? Understanding the delicate balance between heat and growth is crucial for any green-thumbed enthusiast.
The dance between scorching temperatures and gentle growth is a complex one, with soil temperatures and unpredictable weather patterns playing leading roles. Before you embark on a summer seeding journey, delving into the factors that influence seed germination in the summer season is essential. Whether it’s the sweltering mid-summer sun or the more forgiving late-summer clime, timing is everything.
In this article, we’ll uncover the secrets to successful summer seeding and when to sow grass seed. From choosing the right grass seed to the careful art of lawn care during this challenging season. By preparing the soil properly and mastering watering techniques, you can protect those vulnerable new seedlings and ensure your lawn remains a lush, verdely haven even as the mercury rises. Let’s embark on a journey to achieve a thriving garden and explore the expert tips for successful summer seeding.
Factors to Consider for Summer Seeding
Summer can be a challenging season to sow grass seeds due to the higher air temperatures and potentially drier conditions. While it is possible to establish a green lawn during this time, several factors must be meticulously managed to ensure successful germination and growth of your grass seedlings.
When choosing to sow grass seed in the summer, it is crucial to keep the soil consistently moist. This generally means daily watering of the newly seeded areas. In some cases, particularly when the weather is exceptionally warm or windy, watering 2-3 times per day for approximately 5-10 minutes can be necessary to maintain the ideal level of soil moisture. A high-quality grass seed mix, tailored to the specifics of summer conditions, can increase your chances of achieving a beautiful lawn.
However, the hot weather’s high temperatures can stress young grass seedlings. They might find it difficult to establish and survive unless they receive adequate care. Lawn care during this period entails not only routine watering but also possibly providing shade during the hottest parts of the day.
Considering the type of grass seed is another essential factor. Some grass seeds, such as perennial ryegrass, may have better tolerance to heat compared to others. It’s important to select a seed type that can endure summer’s demanding conditions.
Lastly, keep in mind that germination rates may vary in high temperatures, and so may the development of the new grass. The goal is to sow the seeds during a period that avoids the extreme heat and dry spells of the season. Late summer to mid-autumn often brings cooler nighttime temperatures that can be more conducive to establishing a new lawn from seed.
Soil Temperatures
Soil temperature is a pivotal factor in grass seed germination. Each variety of grass seed has a specific range of soil temperatures where it germinates best. During summer months, soil temperatures are typically not an issue since they are naturally warmer, providing a conducive environment for germination.
However, soil temperatures that are too high can harm the seed. It is essential to monitor the soil to ensure it doesn’t heat excessively, especially in areas with sandy soil, which can heat up quickly. Ideally, soil temperature should remain below 85°F for optimal germination. Maintaining a moist soil surface helps moderate soil temperature and also keeps the seed hydrated, promoting better germination rates.
Weather Conditions
Summer’s severe heat, humidity, and the possibility of drought can create harsh weather conditions that are not ideal for planting grass seed. Excessive heat and limited rainfall can cause water stress, requiring significant attention to watering practices.
It is typically recommended to avoid sowing seeds during periods of extreme heat, as this can kill young grass seedlings before they have a chance to establish themselves. Instead, targeting late summer or early fall sowing takes advantage of more moderate temperatures and the likelihood of increased rainfall, which aids in seedling development.
In conclusion, while planting grass seeds during the summer is possible, it demands careful management of watering, soil temperature, and selection of an appropriate grass seed mix. With dedication to these details, you can aid germination and foster a lush, green lawn despite the challenges of the season.
Best Time for Summer Seeding
Planting grass seeds in the summer can bring about a lush, green yard, but timing is crucial. The later part of summer is particularly suited for seeding, harnessing the period’s gradual cooling temperatures and increased moisture, which serve as ideal conditions for seed germination. While the heart of summer benefits from warmth that encourages faster germination and growth, ensuring success requires observance of outdoor conditions closely.
If temperatures regularly ascend above 25°C, postponing seed sowing is advisable, as excessive heat may cause undue stress on the seeds and hinder optimal establishment. It’s important to factor in specific regional climate patterns, as local alterations in weather may provide opportune windows for seeding even within the summer months.
Mid-Summer
Sowing seeds during the peak of summer is a delicate balance. Ensuring constant soil moisture is vital, typically achieved by frequent watering of the seeded areas. Aim for 2-3 watering sessions daily, spanning 5-10 minutes each, to help seeds germinate. However, summer seeding should be approached with caution, and is generally recommended against unless high air humidity and regular rainfall are expected, such as in elevated regions.
While grass seeds do prefer warmth, they do not fare well in the scorching heat. When temperatures soar above 25°C, it is best to delay planting. Yet, with the right care, sowing in summer can accelerate germination and growth, providing an opportunity to cultivate a healthy and robust lawn.
Late Summer
The transition from late summer to early autumn is often pinpointed as the golden window for sowing grass seeds. During this period, temperatures begin to cool, morning dew becomes more abundant, and the onslaught from weed seeds typically wanes, reducing competition. Seeding in late summer or early autumn favors the successful establishment of new turf. The gentler conditions allow seedlings to establish roots without the stress of the intense mid-summer sun.
This timing not only introduces the newborn grass to the world in comforting conditions but also aids in developing strong roots in preparation for the colder months to come. With less weed competition, you’re paving the way for a dense and verdant lawn that can stand the test of the seasons.
The problems with establishing grass seed usually come from sowing it to early. When done right, sowing in the summer can give great results.
Choosing the Right Grass Seed
When embarking on the journey to create a vibrant green lawn, selecting the right type of grass seed is crucial. With a plethora of species tailored to diverse climates and use-cases, it’s important to identify the one that aligns with your environmental conditions and lawn aspirations.
Key Considerations for Grass Seed Selection:
- Germination Rates: Different seeds have varying speeds to sprout. Perennial ryegrass, for example, germinates quickly.
- Soil Temperatures: Seeds require ideal soil temperatures to germinate—cool-season grasses prefer cooler soil, while warm-season grasses thrive in hotter soil.
- Weather Conditions: Grass seeds demand consistent weather conditions. Dry spells and high air temperatures can hinder growth, necessitating attentive lawn care.
- Soil Type: Sandy soil drains rapidly but may need extra attention to keep soil moist. Ensure the seed is suitable for your soil.
- Lawn Use: Consider if your lawn will face heavy foot traffic or play areas for children, which necessitates a more resilient grass type.
Remember, investing in high-quality grass seed is advantageous for a robust lawn. While any seed mixture can be sown in the summer, consistent watering and care are imperative, as young grass seedlings are sensitive to extreme heat and dry conditions. Seed type matters less than providing optimal growing conditions to assist germentation and establishment.
Preparing the Soil for Summer Seeding
Preparing the soil for a pristine summer seeding is as important as selecting the right batch of grass seed. Begin by loosening the soil to promote aeration, which is crucial for robust root development. Raking the area until it’s smooth helps to remove clumps and rocks, creating an even canvas for the seeds to distribute evenly. Before you introduce seeds to their new home, watering the area thoroughly primes it for speedy germination.
Proper site preparation can’t be overstated. If your lawn shows signs of compaction, aeration is a must. This process involves perforating the soil with small holes to allow air, water, and nutrients to penetrate the grass roots. Leveling the ground and filling in any dips or holes ensures uniform seed placement and ultimately, a uniformly lush lawn. These preparatory acts set the stage for successful summer seeding, paving the way for those grass seedlings to flourish.
Testing Soil Moisture
Grass seeds are like Goldilocks – they need conditions that are just right. Moisture testing is imperative; the soil should be damp to the touch but not soaking wet. If you’re dealing with clay soil, aim for around 12mm of watering, while sandy soils might need up to 25mm to provide a conducive environment for grass seed germination.
Adjust your watering schedule according to your soil’s type and the weather – hot and dry conditions mean you’ll be on the higher end of the watering spectrum. To give your seeds the best start, consider a light topdressing of soil to keep them from drying out or being washed away. Initially, you may find yourself watering daily to maintain the ideal moisture levels, especially during the first six weeks when the growing grass is most vulnerable.
Soil Preparation Tips for Sandy Soil
Sandy soil presents a unique challenge when sowing grass seed, primarily due to its fast drainage and poor nutrient retention. Here’s a table with steps to enhance its suitability for your lawn seed mixture:
|
Step |
Action |
Purpose |
|---|---|---|
|
1 |
Add lawn soil |
Improves moisture and nutrient retention |
|
2 |
Remove debris & rake flat |
Creates a smooth, even surface for seeding |
|
3 |
Firm the soil by walking over it |
|
|
4 |
Rake in lawn fertilizer |
Boosts soil fertility for better seed germination and growth |
Following this approach ensures that even with a base of sandy soil, you’re enhancing its potential to support a thriving, green lawn. Remember, careful preparation and maintenance serve as the groundwork for those grass seedlings to develop into a lush carpet of lawn that will make your neighbors green with envy.
Lawn Care during Summer Seeding
Summer seeding can be a successful venture, yielding quick grass germination and growth due to the warmer temperatures that grass seeds covet. However, diligence in lawn care is the pivot around which a thriving summer lawn revolves. Ensuring your fledgling grass receives the appropriate care is critical, as negligence—particularly in watering and maintenance—can stifle its potential, leaving you with a lackluster lawn.
When bestowing your lawn with its sprinkle of summer seeds, remember to support them with the necessary sustenance. Integrating fertilizers into your lawn care routine either before or after seeding can deliver a buffet of essential nutrients, fostering robust and healthy seed germination and growth. This buffet nourishes the soil, providing a foundation upon which your green lawn can mature into full splendor.
Watering Techniques
Mastering the art of watering is essential for nurturing a nascent summer lawn. First, ensure the soil’s top inch is sufficiently moistened prior to germination. Once your seeds have taken root and sprouts appear, it’s time to adjust your irrigation game plan. During these early stages, aim for watering depth—wetting the soil to a depth of about three inches encourages deep root growth, which is vital for the grass’s longevity.
As your grass gains strength and stature, shift your watering schedule to once or twice a week, still targeting a moisture depth of three inches. This reduction in frequency encourages roots to delve deeper in search of water, reinforcing the lawn’s resilience. Once your grass proudly stands on its own—a fully grown turf—it’s time to put a pause on regular watering, unless a drought decrees otherwise.
Young grass is ready for its first trim when heights hit about three inches. Keep the blade set high during this debut season, aiming for a 3 to 4-inch cutting height to promote a dense and healthy growth pattern. Strategic watering, meaning thorough soaking at less frequent intervals, is a cornerstone of effective lawn maintenance; it underpins the lushness and vibrancy of your grass.
Protecting New Grass Seedlings
As delicate as they are promising, new grass seedlings must be shielded from the harsh gaze of the summer sun. While warmth is welcomed, scorching temperatures can hinder the ascendancy of these tender shoots. Maintaining an oasis of moisture in the soil is paramount for grass seedlings during their germination marathon—a battle against both heat and evaporation.
Employing a light mulch or choosing a shaded time of day for watering can provide seedlings with some reprieve from the intensity of midday sun. Furthermore, morning irrigation routines bestow upon seedlings the benefit of cooler temperatures and reduced wind, resulting in a minimized loss of moisture while maximizing the water uptake.
Tending to new grass requires you to perform a balancing act. Adequate moisture must be weighed against the risks of overwatering, which can lead to disease or poor root development. Vigilance in your watering technique—and an understanding of your lawn’s particular needs—can mean the difference between a patchwork of struggling sprouts and a uniform sea of green tranquility.
Tips for Successful Summer Seeding
Summer can certainly challenge the typical gardener looking to cultivate a lush, green lawn from seed. As you consider sowing grass seeds during the warmer months, keep in mind that high air temperatures and potential dry spells call for diligent care.
Tips for Successful Summer Seeding:
- Water Wisely: Maintain soil moisture without over-saturating. Frequent, light watering helps seedlings without causing runoff or erosion.
- Choose Correctly: Opt for a high-quality grass seed mix that suits your climate. Some grass types, like perennial ryegrass, tolerate heat better.
- Watch the Weather: Aim for sowing before a forecasted mild spell. Extreme heat can impair germination rates and stress young grass seedlings.
- Soil Prep: Ensuring your soil is fertile and aerated can help. Sandy soil, for instance, requires more frequent watering due to its quick draining quality.
- Timing is Key: If possible, plan your sowing for late summer when the soil is still warm but the temperatures start to ease, particularly the night-time temperatures.
- Measure: Use the right amount of seed per square metre to avoid overcrowding as this can lead to uneven growth and vulnerability.
- Maintenance: Keep your seeded area clear of foot traffic and monitor for any weed seeds that can compete with your new grass.
By following these simple, yet effective lawn care guidelines, your summer seeded grass has the best chance of flourishing into a vibrant lawn. Remember, patience and persistence in maintaining the right conditions for your batch of seed will reward you with a beautiful green space.
Red Thread Revealed: Understanding and Eliminating Lawn Disease
Imagine gazing out at your lawn only to find it marred by unsightly patches of pink or red. Red Thread disease in turf is a common yet perplexing turf disease that can detract from the beauty of your grass.
A deeper knowledge of Red Thread is essential for gardeners and homeowners who treasure their lush, green carpets.
In the following article, we unravel the mystery of Red Thread, from detection and prevention to effective strategies for maintaining a healthy, resilient lawn.
What is Red Thread Disease in My Lawn?
Red Thread disease is a troubling condition afflicting lawns, triggered by the fungal organism Laetisaria fuciformis. This culprit launches an assault on grass blades under specific environmental conditions, often leaving homeowners distraught at the sight of their once-lush turf.
Key Indicators:
- Appearance: The disease emerges as reddish-brown patches on the lawn, intermingled with pink or red fibers.
- Structure: The “red threads” are the fungus’s fruiting bodies, and they crystalize into brittle structures outstretching from blade tips.
- Favored Conditions: Wet weather, insufficient lawn nutrition, and poor air movement are the disease’s best allies.
- Grass Types at Risk: Perennial ryegrass, fescues, bentgrass.
Managing Red Thread involves fostering a healthy lawn through adequate fertiliser, good soil conditions, and preventing excessive thatch formation.
By ensuring your grass receives the right nutrients and care, you’ll not only keep Red Thread at bay but also maintain a vibrant and healthy lawn.
Is Red Thread something to worry about and can it kill my grass?
Red Thread disease in turf, caused by the fungus Laetisaria fuciformis, is a common sight in lawns, especially during late spring and humid conditions. This lawn disease is named for the red or pink threads that appear on the grass blades, often creating unsightly patches. Although Red Thread can make your lawn look less appealing, the good news is that it rarely kills grass. Instead, it affects the grass superficially, damaging the blades but not invading the grassroots or crowns.
While Red Thread does not typically result in dead grass, it can weaken your lawn’s overall health. A weakened lawn is more susceptible to further stress and possible invasion by other diseases. Therefore, it’s crucial to address the issue to maintain a healthy lawn.
To manage Red Thread disease, one should focus on maintaining optimal lawn health rather than turning to fungicides. Good cultural practices include proper fertilization, regular mowing without cutting too short, and ensuring good air movement. Enhancing the grass plants’ vigor allows them to outgrow the damage, and eventually, the symptoms of Red Thread will fade away, restoring the lush green appearance of your lawn.
It’s clear that while Red Thread can be a concern due to the cosmetic damage it inflicts, with proper lawn care, it’s unlikely to kill your grass.
How do i recognise Red Thread?
Recognizing Red Thread disease in turf, a fungal lawn disease, is straightforward once you know what signs to look for. This malady manifests as pink or tan patches, ranging from one inch to two feet in diameter, amidst your lawn’s green expanse. Within these circles, you’ll notice an intermingling of unaffected grass with symptomatic blades showing signs of decay.
Take a closer look at the afflicted grass blades; they often have protruding pinkish-red threads, a hallmark of the disease caused by Laetisaria fuciformis. These threads are the fungal strands that give Red Thread its name. In wet weather, you might also see pink or reddish cotton-candy-like growths near the grass’s base—another telltale indicator.
Affected grass types, such as red fescue, ryegrass, common bent, and annual meadow grass, display these symptoms, particularly in spring but not limited to it—as outbreaks can also occur in fall and winter. A lawn with Red Thread will have a ragged look due to the mix of healthy and infected blades.
By identifying these key signs, you can confirm the presence of Red Thread disease in your lawn:
- Pink or tan patches within the grass
- Distinguishable red threads on grass blades
- Decaying grass areas with a ragged appearance
- Pink/reddish cotton-candy-like growths (under wet conditions)
This fungal affliction thrives in specific environmental conditions such as wet, humid weather, and poor air movement, so be vigilant during such times.
What conditions encourage Red Thread?
Red Thread disease in turf, a widespread lawn ailment, adversely affects many grass varieties. This fungal disease is particularly active under specific environmental conditions, which are conducive to its growth and spread. The following factors can encourage Red Thread in your lawn:
- Temperature and Humidity: Red Thread disease flourishes when the thermometer registers cool temperatures, between 40 to 75 degrees Fahrenheit. It’s at these cooler temperatures that high humidity can also play a pivotal role in the disease’s development, offering a moist environment where the pathogen can thrive.
- Moisture: This fungal lawn disease finds its perfect breeding ground in excessively wet weather. Whether from overwatering, poor drainage, or a naturally wet season, too much moisture is practically an open invitation for Red Thread.
- Lawn Health Factors: Lawns that are not in their peak condition are more susceptible. Specifically, lawns with a hefty thatch layer, those suffering from low nitrogen, or nutrient-poor grass are prime targets.
- Unfavorable Growth Conditions: Grass that doesn’t get enough sunlight, is under drought stress, or experiences heavy foot traffic can become weak, making it far more vulnerable to a Red Thread invasion.
By ensuring your lawn is well-nourished, free of excessive thatch, and properly drained, you can create an environment that is less inviting to Red Thread and helps keep your grass healthy and vibrant.
Are there grasses that are resistant to Red Thread?
Absolutely, certain grass varieties exhibit a higher resistance to Red Thread disease in turf, a common issue caused by the fungal pathogen Laetisaria fuciformis. Notably, some Barenbrug fescue varieties have been acknowledged for their robust resistance against this lawn disease. Two prominent Barenbrug varieties that stand out for their Red Thread resilience are Barcrown and Barpearl.
When selecting grass varieties with greater resistance to fungal diseases like Red Thread, these specific fescues can be an excellent choice for lawn enthusiasts seeking to maintain a vibrant and healthy lawn. Keeping grass healthy and less susceptible to thread fungus, these varieties can help to minimize the appearance of the characteristic pink or red threads and unsightly brown patches associated with the disease.
Ensuring that your lawn consists of grass varieties with innate resistance is a proactive step towards combating fungal growth and fostering a robust turf. Here’s a snapshot of the aforementioned resistant grass varieties:
By integrating these resistant types of grass into your lawn, you create a resilient foundation that can withstand unfavorable environmental conditions, such as wet and humid weather, that typically promote the growth of fungal lawn diseases.
Conclusion
Red Thread disease in turf is an unsightly condition that often points towards underlying health issues with your turf, such as low nitrogen levels or environmental stress. This fungal lawn disease, caused by the pathogen Laetisaria fuciformis, emerges as small brown patches that grow larger over time, often under wet or humid conditions.
Chemical treatments for this condition are generally discouraged, particularly for residential lawns, and should only be considered in severe cases. Instead, the best line of defense involves cultural practices. An appropriately balanced fertilization regime, specifically tailored to provide adequate nitrogen, can hinder the development of Red Thread and promote a lush, resilient lawn.
Maintaining the health of your turf post-treatment is imperative. Regular and correct mowing, smart fertilizing, and judicious watering are key in sustaining a vigorous lawn appearance and function. If you suspect your lawn is infected, accurate identification is paramount for targeted control. Consulting a turfgrass pathology lab may be beneficial for those who need assistance with fungus identification.
Remember, a proactive approach with proper lawn care techniques can effectively manage Red Thread and keep your grass looking healthy and vibrant.
|
Strategy |
Explanation |
|---|---|
|
Fertilization |
Apply the proper amount of nitrogen to support growth. |
|
Mowing |
Cut the grass to the correct height and with sharp blades. |
|
Watering |
Water deeply but infrequently to encourage strong roots. |
|
Chemical Treatment |
Use as a last resort for severe infestations. |
Do you want a lush, green lawn that withstands the summer’s heat with ease. In warmer climates, Bermuda grass is the go-to choice for such resilience. But what about the cooler, damp shores of the UK? Can you use Bermuda Grass in the UK?
Bermuda grass, known scientifically as Cynodon dactylon, is a popular turf choice particularly suited for its tolerance to heat and heavy foot traffic. It is a staple in regions where the sun reigns supreme.
In the following article, we’ll delve into the natural habitat of Bermuda grass, explore the specific climates it thrives in, and uncover the reasons why it might not be the dream turf for British gardens.
What is Bermuda Grass?
Bermuda grass, scientifically known as Cynodon dactylon, is a warm-season grass that thrives in hot and dry climates like those found in Southern Europe. It is characterized by its coarse leaves and remarkable resilience, often persisting once it takes hold, which can lead some to consider it weed-like in nature.
Renowned for its exceptional heat and drought tolerance, Bermuda grass is a preferred choice for heavily trafficked areas such as athletic fields and golf course tees. This grass retains its vibrant green color throughout the year in tropical zones, indicating its suitability for locations with a similar climate profile.
Quick to establish itself and with an aggressive growth rate, Bermuda grass is low maintenance when it comes to water requirements, thanks to its drought-tolerant properties. It is able to survive lower rainfall levels and higher temperatures, which contributes to its popularity in drier regions. For lawn owners in appropriate climates, Bermuda grass can be an excellent choice due to its ability to withstand challenging weather conditions.
Characteristics of Bermuda Grass:
- Growth habit: Aggressive, warm-season
- Appearance: Coarse, rough leaves
- Drought tolerance: High
- Maintenance: Low, withstanding low rainfall
- Use: Athletic fields, golf courses
- Climate: Thrives in hot, dry climates
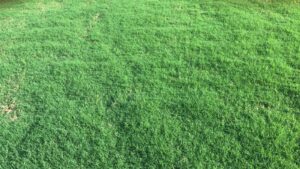
Monaco Bermuda Grass from Barenbrug.
Where is the world is Bermuda Grass commnly used?
Bermuda Grass has garnered recognition for its resilience and adaptability in various regions globally, particularly in areas synonymous with scorching temperatures and sparse rainfall. Favoured for its endurance in hot climates, Bermuda Grass has become the preferred choice in Southern Europe, where the mercury regularly climbs to 30-degrees and beyond. Its remarkable drought tolerance makes it well-suited for these arid conditions.
This robust grass species thrives within USDA Plant Hardiness Zones 7 to 10, marking a wide geographic footprint where its cultivation is optimal. The United States, known for its diverse climatic zones, has many areas where Bermuda Grass is not only used but flourishes throughout the year. In tropical locales, this grass’s ability to stay verdant year-round is highly prized, providing a constant lush landscape.
However, when grown in regions where temperatures plummet under 60 degrees Fahrenheit, Bermuda Grass slips into dormancy, its growth halting until warmth resumes. Its aggressive growth rate, which some while deem beneficial, can sometimes cause issues. In areas it is not deliberately sown, Bermuda Grass can be an invasive challenge, often considered a weed due to the difficulty in its complete removal.
What coditions does Bermuda Grass need to thrive?
Bermuda grass is a robust and adaptable species, famous for its ability to flourish in hot and arid environments, especially where temperatures hover around 30°C. This tough grass has garnered a reputation for being highly drought-tolerant, meaning it can soldier on during spells of scarce rainfall without a hitch. Sunlight is a vital ingredient for the success of Bermuda grass—it thrives under the full glare of the sun but doesn’t shy away from a bit of shade.
Here’s a quick rundown of the conditions Bermuda grass needs to thrive:
- Climate: Prefers warmer climates with high temperatures.
- Drought Tolerance: Can endure periods without much water.
- Sunlight: Loves full sun but can handle partial shade.
- Soil Adaptability: Not fussy about soil types, even grows in salty coastal soils.
- Maintenance: Needs regular care, including monthly fertilization and consistent mowing.
Bermuda grass isn’t just a survivor; it’s a conqueror, known for its aggressive growth. This can be a double-edged sword because while it fills in patches quickly, it also requires frequent mowing to maintain a height of about 1 to 1.5 inches. In summary, Bermuda grass is perfect for those who live in warmer regions and are committed to its upkeep. It’s the preferred grass for athletic fields and golf course tees thanks to these resilient traits.
Why is Bermuda Grass unsuitable for the UK?
Bermuda grass, while a popular choice for athletic fields and golf course tees in warmer climates, is unsuitable for the UK’s distinct environmental conditions. Known for thriving in hot and dry climates, Bermuda grass is adapted to perform well in areas like southern Europe and the southern United States. These regions often fall within the United States Department of Agriculture Zones 7 to 10, where temperatures consistently exceed 30 degrees Celsius and rainfall is lower than average.
In contrast, the UK’s climate is considerably milder and generally wetter, with temperatures rarely sustaining such highs for extended periods. Bermuda grass’s exceptional drought tolerance and aggressive growth rate become redundant in the UK, where these survival traits are not essential. Furthermore, the grass’s peak growth occurs under conditions that are uncommon in Britain. Consequently, maintaining Bermuda grass in the UK could lead to challenges such as frequent overwatering and potential for disease due to excess moisture, not to mention the regular monthly fertilization it would require.
Considering these factors, UK lawn owners are better served by grass varieties that are adapted to cooler temperatures and can handle the nation’s more frequent rainfall.
|
Climate Factor |
Bermuda Grass Preference |
UK Condition |
|---|---|---|
|
Temperature |
Above 30°C |
Mild |
|
Rainfall |
Low |
Higher and frequent |
|
Soil Type |
Can survive shallow soil |
Varied soil types |
|
Growth Requirements |
High heat & drought |
Milder climate |
The hum of lawnmowers is a sure sign of spring, but for your new grass, that sound could come with a question mark. How soon can I cut my grass after seeding?
Grass isn’t just a plant; it’s a living carpet that responds to care and timing. The growth cycle of new grass sets the stage for its future health, dictating its resilience and fullness. Factors like species, climate, and soil conditions whisper the secrets of perfect timing for that inaugural trim.
Nurturing a verdant lawn hinges on your ability to wield a mower with precision and care. The following article takes you through the science and skill of mowing new grass: from understanding the growth cycle to mastering the art of the first cut, ensuring your grass gets the right start to flourish.

Understanding the Growth Cycle of New Grass
The genesis of your lush lawn begins with the seemingly simple act of seeding, yet it is a complex dance of germination stages that must occur for successful growth. The first act of this intricate performance involves water absorption, where the new grass seeds eagerly soak up water, a vital life force, to activate their growth journey. Following this, root emergence takes center stage, with seedlings cautiously extending tiny roots down into the nurturing soil like ballet dancers reaching their toes to the ground.
As your seeded lawn begins to embrace life, shoot emergence unfurls as the crescendo, with the first delicate green shoots—baby grass blades—peeking through the earth’s surface, like the first notes of a symphony breaking the silence. These fragile sprouts are your first visible sign of success, indicators that the seeds have embraced their habitat.
The particular type of grass seed you’ve sown silently orchestrates its own tempo of growth, as does the soil temperature, laying down the rhythm to which your new grass will develop. Moisture levels in the soil conduct the pace, ensuring that the emerging grass blades flourish healthily and unhurriedly. Your patience here is rewarded as, typically within 8 weeks, these pioneering blades can reach their ideal height and be ready for their first trim, contingent upon these conditions.
The Importance of Mowing in New Grass Care
Creating a green tapestry underfoot does not end with successful germination—you must also enter into a partnership with your lawn by establishing a proper mowing regimen. Your new grass benefits enormously from mowing, but only when the time is ripe. The act of mowing, when timed correctly, is akin to pruning a rose bush: it encourages the proliferation of grass blades, which in turn gives rise to a denser, healthier, and more appealing lawn.
However, the mantra ‘timing is everything’ could not be more fitting here. Grasping the sweet spot—generally after several weeks and when the grass is sufficiently tall—means avoiding the perils of mowing too soon. A premature encounter with a mower blade could spell disaster, overturning new plants that haven’t had the chance to anchor their feet firmly into the soil with strong roots.
A properly watered and timely mowed lawn isn’t merely a cosmetic enhancement to your property; it’s a bulwark against opportunistic weeds and lawn diseases. A well-mown lawn is the guardian of your garden, fostering grass density that makes it a formidable opponent against the invasion of unwanted flora.
Factors that Influence the Growth of New Grass
Several factors conspire to write the success story of your seeded lawn, beginning with the type of grass seed selected. Precise grass species thrive under specific temperature conditions and introduce variations in germination speed and growth vigor. Soil temperature acts as a conductor of growth, too warm or too cold, and the symphony of germination can be slowed or hastened, impacting the timing of your first mowing milestone.
Moisture levels join the ensemble, playing a critical role in nurturing the nascent grass. Too little water and your grass seedlings may wither before their time; too much, and they may drown in their cradle of soil, stifling before they can grow strong.
In creating a harmonious lawn, these factors—the soil temperature, moisture levels, and the grass type—play a coherent tune that influences the development of your new grass. Each must be considered and balanced to ensure the cultivation of a robust, green, and flourishing lawn that can stand up to the turning of the seasons and the passage of footsteps across its verdant expanse.
Mowing Considerations for New Grass
Patience is key when it comes to nurturing a lush lawn from its seeded beginnings. Although it’s tempting to run the lawn mower over the new growth to quickly attain that perfect green carpet, restraint is essential. Typically, new lawns are ready for their maiden trim about six weeks after seeding. This crucial timing ensures that young grass plants are not overly stressed by a premature cut, which can undermine their growth and affect the density of your lawn.
Before you can declare your grass ready for mowing, there’s a simple yet effective test that can be done—especially with new turf. The ‘tug test’ involves gently pulling on the turf; if it stays firmly in the ground, it indicates that the roots have re-established post-relocation and it’s likely safe to mow. During periods of hot and dry weather, keep an eye on the moisture of your new grass. A light misting can be life-saving for the fragile seedlings, preventing them from desiccation and death.
The golden rule when mowing newly seeded grass is to wait until it reaches the robust height of 60-74mm (approximately 2.5 to 3 inches). Always mow when the grass is dry, as this minimizes the stress and damage to the grass blades. Moreover, never remove more than one-third of the grass height in a single mowing session. This practice maintains grass strength and promotes vigorous growth, setting the stage for the healthy spread of your green lawn.
Determining the Ideal Mowing Height for New Grass
Every species of grass has its sweet spot—a height at which it thrives best. Ornamental fescues, for example, can grace your lawn at a deft height of 10-20mm, whereas other grass mixes may warrant a slightly loftier 20-40mm for optimal health and aesthetics. Nonetheless, the universal advice is to avoid mowing newly seeded grass until it towers at a minimum height of 60mm. This ensures that the young plants are strong enough to survive the cut without being damaged in the process.
During the formative months of your lawn’s life, usually the first 6 to 9 months, the grass should be kept around 5 cm tall. This height gives enough cover to fortify the young plants against environmental stresses. Fine-leaved grass varieties, however, can eventually be treated to a closer cut at around 3 cm once they are well established. It’s also important to remember that mowing strips away nutrients from the grass, making regular feeding and treatment of your lawn essential to replenish these vital resources.
Tips for Mowing New Grass During Dry Weather Conditions
Dry weather comes with its own set of rules for mowing. Ensure your lawn is completely void of morning dew or irrigation water before you embark on mowing. Wet grass can tear or pull out more readily, which is particularly harmful for a new lawn trying to set its roots. Keeping the blades of your grass dry during the cut minimizes vulnerability and aids in a cleaner, sharper trim.
In the initial phases after overseeding, collecting the grass clippings can be beneficial, as leaving them on the lawn can smother and harm the young seedlings. Furthermore, the condition of your mower’s blades is a non-negotiable aspect for cutting new grass in dry weather. Blunt blades can cause ragged cuts, leading to stress and damage; hence, maintaining sharp mower blades is imperative to prevent such unwelcome outcomes.
By adhering to these guidelines and observations, your seeded lawn stands the best chance of maturing into the robust, green oasis you envision.
Maintaining a Healthy Lawn through Proper Mowing Techniques
When endeavoring to create the ideal emerald expanse in your backyard, mowing your new grass with precision and care is vital. A rule of thumb for establishing a vibrant and healthy lawn is to begin mowing when the new turf reaches a height one-third taller than your desired final mowing height. Generally speaking, this milestone occurs four to six weeks post-seeding. Initiating the mowing process at this juncture is critical as it encourages stronger and deeper root development.
To uphold the vitality of your turf, it’s fundamental to adhere to the golden “one-third” rule. This guideline entails not removing more than one-third of the grass’s height in a single mowing session. Abiding by this principle minimizes stress on the grass, allowing it to maintain stability and endorsing a more profound root system.
The Impact of Sharp Mower Blades on New Grass
The condition of your mower blades can profoundly influence the health and appearance of your new lawn. Sharp blades provide a clean, swift cut, which is essential during the tender growth stages of new grass. Conversely, using dull blades can create jagged cuts, leaving the grass susceptible to browning, disease infiltration, and increased water loss. New grass necessitates a crisp cut to minimize stress and foster rapid healing of the grass blades.
Employing sharp mower blades when tending to your newly seeded lawn not only maintains the wellness of the grass but also imparts a meticulous, professionally groomed finish. The difference between sharp and blunt blades is clear: dull mower blades may pull or tear at the grass, inflicting damage and stress upon the young plants, while sharp blades perform with efficiency, preserving the lawn’s integrity and promoting robust growth.
How Soon Can I Cut My New Grass?
Timing plays a crucial role when giving your new grass its initial trim. Patience is key, as prematurely passing a lawn mower over those delicate green shoots can hinder the establishment of a lush lawn. For new turf, typically it takes about 3-4 weeks for the roots to sufficiently anchor themselves into the soil. This anchoring is essential before bringing out the lawn mower, to prevent uprooting the grass or causing unwelcome brown patches and potential weed infiltration. The readiness of your lawn for its first cut hinges on root security – if the turf can be gently lifted without resistance, it’s not yet time to mow.
On the other hand, for nurseries where grass seed has just been sown, the maturation timeline stretches up to 2 months. It’s a period in which you should carefully monitor growth and avoid any mowing action that could uproot the fresh grass plants. The unmistakable cue to get mowing is when the turf resists a gentle tug, indicating well-embedded and secure roots.
In summary, ensuring your new grass is robust enough to withstand the initial mowing involves two key factors: time—from 3-4 weeks for new turf and up to 2 months for seeded lawns—and the firm establishment of roots.
The rule of thumb for scheduling the first mow of new grass
When it comes to your newly seeded sanctuary of green, remember the six-week guideline. Allowing six weeks for your new lawn to establish presents you with a healthier, stronger foundation for future growth. However, if you’re managing an overseeded lawn, the mower may make an appearance slightly earlier, usually around 7-10 days after seeding. Following that, give it a rest and wait another week or so before the second rendezvous with the mower.
Once your new grass has risen to an ideal height—typically three inches—the blades of your mower should be set to reduce the height by just one inch. Adhering to this principle helps nurture a strong root system beneath the surface. Moreover, it’s imperative to stay away from mowing when the grass is wet, as this can create additional vulnerability in young shoots, which may lead to unwanted damage.
Following the first few trims, grass clippings should be collected in a bag rather than left on the lawn to prevent smothering new seedlings or grass plants. This attention to the little details serves to provide your entire lawn with the optimal conditions to thrive and flourish into the green oasis you envision.
Signs that indicate it’s the right time to mow new once.
Identifying the opportune moment to start mowing your newly sprouted grass involves some easy-to-spot signs. The tug test is a simple yet effective assessment for new turf— if the blades of grass firmly hold their ground rather than break off, you’re good to go. For those patches where seeds have just begun their growth journey, a blade length of 6-7 cm is your visual cue that it’s time to rev up the lawn mower.
Wait until the grass seedlings stand tall, between 3 and 3½ inches, to minimize the risk of root disruption and promote uninterrupted growth. Rushing the process can lead to weakened grass that’s susceptible to lawn diseases. Instead, observe the emergence of verdant shoots and blades as a clear indication that your green carpet is waking up, ready for its first grooming session. Commit to these indicators, and you’ll be guiding your lawn on the path to developing into a robust and inviting living space.
A lush, green lawn is the canvas of your home’s natural beauty. Selecting the ideal grass variety is the cornerstone of a resilient lawn. Below, this guide unfolds expert advice that will ensure your turf stands up to the rigors of nature and play. What is the most hard wearing grass for a lawn is a question that comes up regularly. read this article to learn more.
Choosing the Right Grass Variety
When it comes to cultivating a beautiful and resilient lawn, selecting the right grass variety is paramount. This choice is not just about aesthetics; it involves understanding and matching grass types to your unique garden conditions and lifestyle. Factors such as soil type, sunlight exposure, and drainage play vital roles in determining which grass variety will thrive. Soil type can vary from dense clays to light sandy soils, each supporting different grass varieties. Similarly, the amount of sunlight your lawn receives can either foster growth or impede it, necessitating the choice of shade-tolerant or sun-loving varieties. Drainage, too, is crucial—excess water can lead to root rot in species that prefer drier conditions.
Among the most resilient varieties is Perennial Ryegrass, which rapidly establishes a lush and dense turf. Perennial Ryegrass is equipped to handle heavy usage, making it an excellent choice for lawns enduring frequent foot traffic, energetic play, and lively pets. It is an ideal candidate for high-traffic lawns expecting continuous wear and tear.
Choosing an appropriate grass seed mixture, such as one that includes durable dwarf ryegrass varieties, can also make lawn maintenance more manageable. This is particularly helpful for lawns in high-use areas where durability meets the aesthetic aspiration of a dense and green lawn. By selecting grass varieties that are suited to your specific environmental conditions and intended use, you can ensure that your lawn will not only endure but also flourish with minimal effort.
Factors to Consider When Selecting Grass Seed
When on the hunt for the perfect grass seed, several critical factors demand your attention. Firstly, consider the soil type in your garden. The correct seed choice can accommodate poor quality soil or leverage the benefits of a rich loam. Sunlight exposure is another pivotal element, as some grass varieties pine for the sun, while others thrive in shaded lawns with less direct light.
Drainage capacity is an often-overlooked but significant detail. Areas with superior drainage support a different range of varieties than those with a tendency to retain moisture. Additionally, think about the necessary upkeep, including mowing heights and frequency, demand for watering, and the need for Pre-Seeding Fertiliser.
The intended use of your lawn also plays an indispensable role. Whether it’s a showpiece ornamental lawn, a playground for kids, or a common area for gatherings, different grass types can withstand wear differently. Perennial Ryegrass, for instance, forms a dense turf capable of recovering from wear, while Tall Fescue is known for deep roots that confer drought tolerance.
By strategizing your grass seed selection according to these factors, you’re equipping your lawn with the best chances for a robust and beautiful presence.
Perennial Ryegrass: An Excellent Choice for High-traffic Lawns
Perennial Ryegrass stands out as an exceptional choice for high-traffic lawns because of its balanced combination of aesthetic and functional qualities. Known for rapid establishment and the formation of a robust dense turf, this grass variety ensures a green lawn that can endure frequent mowing. While it presents a captivating fine leaf texture and a lively green shade, its true value lies in its strong root system and tough blades, providing the durability needed for areas experiencing heavy foot traffic such as parks, schools, and family gardens.
Despite its remarkable resistance to trampling, perennial ryegrass isn’t impervious to damage. However, this grass type can recover from wear, albeit with a higher degree of care compared to other grass varieties. A comprehensive maintenance regimen involves irrigation, frequent mowing to optimum mowing heights, and proper fertilization to keep the lawn in peak condition. Thus, while perennial ryegrass is a remarkable choice for durability, it’s essential to commit to its maintenance needs for the best results.
Drought-Tolerant Grass Varieties for Dry Weather
Dry weather conditions pose a significant challenge to maintaining a lush and vibrant lawn. Luckily, several grass varieties have evolved drought tolerance as a survival trait. Tall Fescue is a laudable example, valued for its deep roots that search out moisture from deeper in the soil, enabling it to withstand dry spells. Its suitability for heavy clay soils further accentuates its adaptability across various lawn scenarios.
Other commendable choices for drought conditions include slender and chewing fescue varieties. These types are well-suited to sandy soils, where they can remain hardy with limited moisture. Rye grass, with its inherent robustness, can also maintain a green appearance under the stress of dry weather.
While specific grass types display resilience in drought conditions, it’s also beneficial to consider other practices such as maintaining higher mowing heights to reduce stress on the grass during dry periods. By selecting the appropriate drought-tolerant varieties and managing them wisely, you can ensure a durable and eye-pleasing lawn, even in the challenges posed by dry weather.
Preparing Your Lawn for Seeding
Preparing your lawn to receive new grass seed is a critical step towards nurturing a healthy and resilient turf. Before you begin, clear the area by removing any weeds, moss, stones, and miscellaneous debris. This thorough cleanup helps prevent future growth issues and creates an unobstructed environment for the new seeds to flourish.
Once your lawn area is clean, it’s time to focus on nutrition. Incorporating pre-seed fertiliser into the soil is highly recommended. Aim to lightly rake in this particular type of fertilizer three to five days before you plan to sow your seeds. Doing so ensures that the nutrients are available right at the root zone where new grass will need it the most.
To promote a uniform lush lawn, distribute the grass seed evenly over the prepared area. Aiming for a rate of 35g per square materialized by using a spreader will ensure accuracy and consistency in application. After spreading the seed, another gentle raking helps settle the seed into the topsoil, optimizing seed-to-soil contact which is crucial for successful germination.
For areas expecting a high rate of foot traffic, where durability is just as significant as appearance, a hard-wearing grass seed mixture that includes perennial ryegrass is advisable. This mixture ensures not only a level seedbed but also heightened wear tolerance, making it perfect for areas that will host activities, be playgrounds for pets, or endure frequent social events.
Using Pre-Seeding Fertilizer for Strong Root Development
A vibrant and hard-wearing lawn starts from below the surface. Strong root development is the foundation of a durable lawn, and using a pre-seeding fertilizer specifically designed for this purpose is critically beneficial. By applying a pre-seed fertilizer before sowing, you essentially provide the future grass with a nutritional head start, fostering healthier and robust growth.
The application of a pre-seed fertilizer offers several advantages. It encourages rapid root development, augmenting the overall strength of your lawn. This results in taller, greener, and healthier grass that is better equipped to handle the stress of wear and intrinsic to high-traffic lawns. Moreover, this early nutrition helps young grass withstand external pressures such as drought or disease.
To ensure optimal results from your pre-seed fertilizer, follow these simple steps:
- Choose a pre-seeding fertilizer that’s appropriate for your lawn’s conditions.
- Apply the recommended amount of fertilizer to the prepared soil.
- Use a rake to mix the fertilizer evenly into the top layer of soil.
Implementing these practices into your lawn seeding routine will significantly enhance the ability of your grass to establish strong roots, which is indispensable in achieving a lush, dense, and durable lawn—perfect for both visual appeal and functional use.
Seeding and Establishment
Proper preparation and seeding are the keys to establishing a tough and resilient lawn. The process starts with meticulous ground preparation—raking and infusing the area with pre-seeding fertilizer to ensure the soil is primed for grass growth. Grass seeds demand an even distribution across the surface, with a precise application rate of 35g per square meter best achieved using a spreader. Once sown, it is paramount to lightly rake the soil, nestling the seeds into the top 1-2cm. To secure optimal seed-to-soil contact, consider a light rolling or treading of the planted area.
Watering plays a non-negotiable role in the germination and establishment of a new lawn, particularly during dry spells. The seeded area should be watered consistently, preferably every other evening, for the initial weeks. This consistent moisture aids the germination process, leading to a healthier start for your lawn. By combining diligent ground preparation, precise sowing techniques, and committed watering, you cultivate the foundation for a robust and hard-wearing lawn.
Best Practices for Seeding a Hard-wearing Lawn
The genesis of a heavy-duty lawn lies in the choice of grass seed. Perennial ryegrass stands out as the champion for enduring lawns that can handle the exuberant play of children or the scampering of pets. Specially blended hard-wearing grass seed mixtures, replete with amenity perennial ryegrass, are engineered to yield a lawn that’s not just rich in colour but also boasts of roots that can withstand the rigors of heavy usage. Drought-tolerant varieties like tall fescue are also formidable contenders, capable of thriving even in less forgiving soils.
For those who seek a lawn that can remain pristine amidst a high footfall, it’s imperative to mull over the lawn’s maintenance necessities, which encompass regular mowing and irrigation. Your careful consideration at the initiation stage will pave the way for a lawn that remains thick, lush, and resilient throughout.
Grass Seed Species for a Dense and Durable Turf
For lawns that must withstand the extreme, perennial ryegrass is the species of choice—renowned for gracing the grounds of premiership football pitches and esteemed event spaces. Its latest varieties brandish leaves with a finesse that deceives the eye; while appearing delicate, they offer formidable resilience and intense green hues. These hard-wearing grass seeds with their swift growth rates, toughened leaves, and thick, fibrous roots cast aside any fear of easy damage, enabling your lawn to maintain a pristine striped aesthetic while also offering longevity and density suitable for a myriad of activities.
Proper Seed Germination Techniques
The germination of grass seed is a dance of natural elements: warmth, moisture, and light. For grass seed to break its dormancy and start life anew, soil temperatures should ideally hover above 8-10 degrees Celsius. In times of insufficient rainfall, supplementing moisture through manual watering every other evening can make a marked difference, encouraging the seeds to sprout within 10 to 14 days under favourable conditions. Remember, the newly sown seeds will depend on your attentiveness to regular watering in their nascent weeks.
Caring for Newly Seeded Lawns
Venturing into the creation of a new lawn is an exercise in patience and commitment. The soil type must be fitting for the grass variety chosen. Pre-seeding lawn preparation entails a thorough site cleansing—eliminating weeds, stones, and debris, potentially adding topsoil if required, and sculpting a level seedbed. For those about to sow, infuse the soil lightly with a nutrient-rich pre-seed fertilizer to kickstart growth and root development. Adherence to the sowing rate of 35g per m2 for new lawns and 20g for overseeding is essential. The final step is to ensure solid seedbed compaction, either with foot pressure or a roller, cementing the seed-to-soil bond for successful grass emergence.
Dealing with Heavy Foot Traffic
Lawns are often the backdrop for family gatherings, backyard sports, and footpaths to our homes, but areas under heavy foot traffic may show wear and tear, falling short of the lush, green ideal. Regular treading can lead to compacted soil, affecting the grass’s ability to absorb water and nutrients, causing brown, patchy, and even dying areas. High traffic can also lead to thatch buildup, which constricts the grass roots and requires effective dethatching or aeration to revive the turf.
It’s important to choose resilient grass species designed for heavy foot traffic to mitigate these issues effectively. Perennial ryegrass, for example, is known for its ability to endure the bumps and bruises of frequent use. Additionally, lawns in these high-traffic areas can be more susceptible to diseases, particularly fungal infections that leave discoloured spots. Rigorous lawn care practices, like appropriate watering, fertilizing, and regular disease inspection, are vital to maintaining grass health in these challenging spaces.
Strategies for Protecting Your Lawn from Excessive Wear and Tear
To prevent your lawn from falling victim to excessive wear and tear, it’s essential to implement protective strategies. Regular fertilization encourages robust grass growth and fends off weeds. Additionally, aeration should be performed annually to alleviate soil compaction; this not only benefits the grass’s root health but also improves the efficiency of water and nutrient absorption.
Mowing practices significantly influence your lawn’s ability to endure frequent use. Keeping to the highest recommended mowing height for your grass variety reduces stress on the lawn. Moreover, regular and ample watering helps maintain hydration, strengthening your lawn’s defences against damage and diseases.
In summary, prevention is always better than cure. By combining careful fertilization, alleviating compaction through aeration, adhering to proper mowing heights, and maintaining steady watering schedules, your lawn is better equipped to resist the detrimental effects of heavy foot traffic and maintain a vibrant, healthful appearance.
A perfect lawn is the dream of every gardener, but behind the lush greenery can lurk a silent enemy. Fusarium disease in lawns can turn this dream into a nightmare. This fungal foe, driven by certain environmental and lawn conditions, presents a stubborn challenge for many green-thumbed enthusiasts.
From cool, moist weather to poor drainage, various factors contribute to the rise of Fusarium patch, targeting even the most cared-for grass types. The disease’s symptoms are often misinterpreted, leading to a delay in treatment and further damage. Patches on the lawn and discolored, unhealthy grass signal the invasion of this unwelcome guest.
With the right knowledge and tools, however, you can arm yourself against this adversary. In this article, we tackle Fusarium patch head-on, exploring its causes, signs of infection, and most importantly, how you can treat and prevent it. Whether you’re waging war against an existing outbreak or fortifying your defenses for the future, this guide is your ally in maintaining a healthy, picturesque lawn.
Causes of Fusarium Patch
Fusarium patch, a blight that leads to discolored and damaged grass, is caused by the fungus Microdochium nivale. This pathogen finds its way into the grass plant through stomata or wounds on the plant surface. Ideal conditions for this disease include persistent humidity and a consistent dampness of the grass blades, conditions that are often exacerbated by imbalances such as high nitrogen levels in the soil or an elevated pH. Fusarium patch can linger in infected plant tissues and thatch, stealthily dispersing through both water and wind as they carry the infected debris across your lawn. This fungal enemy is notorious in cool, wet climates and is particularly aggressive during snowy periods, where it is referred to as snow mould. In addition to the weather, stressors such as excessive shade, inadequate drainage, a buildup of thatch, or a deluge of rainfall can exacerbate the susceptibility of your lawn to Fusarium patch disease.
Weather Conditions
Fusarium Patch finds its stride in the mild spells of autumn and winter. Shorter days and the diminished sunlight due to heavy cloud cover create a canopy for the disease to thrive. The delicate morning mists, so characteristic of the season, can linger into the day, further damping the lawn without adequate air movement to disperse the moisture. The spores of the Fusarium fungus, ever present and waiting, spring into action under these very specific conditions—closed in, damp, and poorly lit, where overnight temperatures remain above average, giving the Fusarium a comfortable habitat on your lawn.
Lawn Conditions
The susceptibility of a lawn to Fusarium Patch disease increases under certain conditions, especially in the cooler, wet days of autumn and winter. Lawns that are under duress — perhaps from being cut too short, being newly established, or experiencing general weakness — are more vulnerable. A plethora of conditions contributes to this vulnerability: a thatch layer that’s too thick, soil compaction, inefficient drainage, and nutritionally unbalanced soil, particularly with excessive nitrogen fertilization.
Grass Types Susceptible to Fusarium Patch
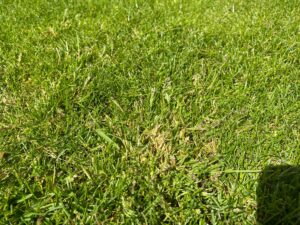
Annual Meadow Grass (Poa annua) with its tell-tale seed heads is very vulnerable to fusarium.
Annual Meadow Grass (Poa annua) rolls out the welcome mat for Fusarium Patch, but the disease isn’t impartial and will infect other species as well, including Ryegrass, Bent and Fescue. These three species are far superior in terms of Fusarium resistance when compared to Annual Meadow Grass. In the case of Fescues, it it generally the case that if you create the conditions in which it thrives, you are inadvertently creating conditions in which Fusarium will not thrive.
Poor Drainage Issues
Fusarium Patch often finds a foothold in lawn areas with poor drainage. Standing moisture from ineffective drainage can create a breeding ground for the disease. The soil compaction that usually accompanies poor drainage means water cannot percolate effectively, turning what might have been a healthy lawn into a petri dish for Fusarium disease. Situational factors like heavy rains can amplify these drainage woes, and common culprits like excess thatch or dense overgrowth can block sunlight, reducing evaporation and worsening surface moisture issues—all perfect conditions for Fusarium Patch to prosper.
Symptoms of Fusarium Patch
The insidious emergence of Fusarium Patch manifests primarily through telltale patches on your lawn, which appear discolored, spotty, and unhealthy. As the disease takes hold, gardeners may witness the development of brown or yellow circles on the grass, while the keen observer may notice fine filaments of white or pink mold adorning the affected areas. These symptoms typically arise during the milder, wetter periods of autumn and winter when daylight is scarce and conditions are just right for the disease to flourish.
Fusarium attacks begin as innocuous small spots, with a distinctive orangey-red-brown hue, which swiftly escalate, burgeoning into larger, pale, and lifeless circles. They carry a slimy white coating, which flags the advancement of the disease. As these spots enlarge, they frequently merge, creating large expanses of damaged turf. The pattern of these orange and brown areas spreading and merging is a classic signature of a Fusarium Patch infestation.
Appearance of Patches on Lawn
Fusarium patch, borne of the Microdochium nivale fungus, is well-known for the creation of discolored brown patches upon traditional lawns. As autumn casts its shadow or mild winter spells linger, small yellowish patches embark on a demise that sees them expand and darken to a grim brown. Varied grass species, from the stately ryegrass to the humble annual-meadow grass, can succumb to the scarring left by Fusarium. The persistence of patches signals a battleground that requires strategic lawn care — proper feeding schedules and effective moisture management can be decisive factors in the steadfastness of a lawn plagued by Fusarium.
Changes in Grass Color and Density
Distinct among the symptoms of Fusarium patch is the gradual transition of turf coloration — from relatively modest yellow spots that amplify both in size and severity, merging to form larger, more sobering dark brown areas. This troubling sequence is most common during autumns and winters that are unduly wet and mild, especially when the turf is robbed of sunlight, strapped for air movement, and finds it challenging to dry out. The preemptive safeguard against such fungal woes hinges on the health of the lawn, where light, air, nutrition, and hydration converge to forge a robust defense.
Prevention and Treatment Options for Fusarium Patch
Keeping your lawn robust and Fusarium-free is a multifaceted task that hinges on keen attention to cultural practices and vigilance. The onset of milder weather conditions, typified by low light and reduced air movement, provides an advantageous environment for the Fusarium fungus, known scientifically as Microdochium nivale, to thrive and wreak havoc on your lawn. As the visible symptoms of brown patches emerge, they signal the need for both preventative methods and treatments to curb the spread of this disease.
Natural control often involves waiting out the conditions that favor Fusarium growth. The transition to colder temperatures, bolstered by increased light levels and improved air circulation, can naturally curtail the fungus’s activity. For sustained disease management, these more hostile conditions to Fusarium must remain consistent; an abrupt return to mild, damp weather can quickly revive the fungal threat.
Chemical interventions, chiefly fungicides, can offer more immediate relief but are subject to stringent regulations, particularly for amateur gardeners, as residential use of professional treatments is often restricted or completely unavailable. This renders vigilance in lawn care and adoption of non-chemical prevention strategies even more pertinent. To safeguard your turf, employing cultural controls such as augmenting aeration and drainage—thereby enabling the grass to dry rapidly after rainfalls—pruning to encourage airflow, and abstaining from late-season nitrogen-heavy fertilization is critical.
Ground temperatures that favor the fungus’s activity range from 12-19°C (54-66°F). In summer, the infection can occur covertly, only becoming conspicuous when the weather cools and grass growth decelerates.
Proper Lawn Care Practices
Mitigating the risk of Fusarium Patch hinges on diligent lawn care habits. Regular aeration treatments tackle soil compaction, enhancing water infiltration and nutrient flow to grassroots. Coupled with scarification, which can also boost drainage and air circulation, your lawn becomes more resilient against Snow Mould and a host of other diseases.
Among other key practices is the judicious application of fertilizers. Foregoing high-nitrogen feeds in favor of low-nitrogen, high-potassium ones during autumn fortifies the plants without encouraging frail growth. Sharp mower blades, optimal grass length, and trimmed shrubs and trees to amplify airflow constitute additional defensive tactics against Fusarium Patch.
Fungicides and Treatment Products
Prevention is superior to curing when it comes to fusarium. Fungicides might offer a solution, yet their accessibility is dwindling and excludes domestic consumers. These restrictions necessitate an even stronger focus on preventative practices to mitigate the onset of the disease before reliance on chemical treatments becomes necessary.
Aeration and Improving Air Movement
Aeration procedures not only relieve compaction but also invigorate the lawn’s underfoot by boosting air and nutrient delivery to the root zone. Disrupting Fusarium spores and impeding their integration within thatch layers is another vital benefit of aeration. Encouraging diverse grass varieties like Perennial Ryegrass, Fescues and Bents through aeration further wards off Poa Annua and reduces Fusarium outbreaks.
Ensuring aeration throughout the lawn through various aeration techniques strengthens the turf, thereby maintaining lawn health and mitigating Fusarium Patch development.
Watering Techniques for Avoiding Wet Conditions
Avoid the pitfalls of overwatering by ensuring that your lawn dries quickly post-dew or rain; improved aeration and drainage are pivotal to this end. Pruning can also increase airflow and thus expedite drying. Manual dew removal or employing practices like scarifying and spiking are recommended to help control moisture levels.
Treating Poor Drainage Issues
Combatting soil compaction through aeration remedies one of the primary causes of waterlogging. Enhancing aeration, in conjunction with scarifying for better water absorption, forms a crucial front line of defense against poor drainage. The removal of dew in the mornings can be an effective daily practice for preventing diseases fostered by wet conditions, helping you to maintain a Fusarium-free lawn.
Common Mistakes in Dealing with Fusarium Patch
Gardening enthusiasts often pride themselves on lush, verdant lawns, but the occurrence of Fusarium Patch can quickly reduce a healthy lawn to a mottled, brown eyesore. A proactive approach is essential, yet certain common missteps can exacerbate the problem. Recognizing these errors is key to maintaining a lawn that thrives throughout the year.
Ignoring Early Symptoms
One widespread mistake in lawn care is the dismissal of Fusarium Patch’s early symptoms. What begins as inconspicuous yellow specks can mature into expansive brown blotches that amalgamate and disfigure your lawn. This misjudgment can propel the fungus to spread with alarming velocity, inflicting substantial turf damage. The roots of the issue often lie in soil compaction, which impedes water absorption and creates a haven for disease. Aeration is the champion here, relieving compacted soil and restoring efficient water infiltration, thus retarding the disease’s progression. When these symptomatic whispers emerge, immediate intervention is key – whether this means employing a targeted fungicide, should one be accessible, or addressing the fundamental issues such as soil aeration and scarification.
Overuse of Chemical Treatments
Chemical treatments have long been the go-to for many lawn diseases; however, a reliance on such methods for Fusarium Patch management can be more harmful than helpful. The Royal Horticultural Society underscores the essence of minimum chemical intervention, focusing instead on sound cultivation routines. These affirmations echo the fact that amateur gardeners lack access to the fungicides that professionals may administer under strict regulatory parameters. Thus, before considering chemical options, it’s advisable to invest in cultural enhancements, including soil improvement and regular aeration, to build an inherent resistance within the lawn.
Ineffective Watering and Drainage Solutions
The crux of many Fusarium Patch issues is insufficient drainage, often a consequence of lawn compaction or an onslaught of precipitation. Such suboptimal conditions pave the way for the proliferation of Fusarium blight. Turf that is water-stressed due to compacted soil displays a vulnerability to the disease, emphasizing the significance of soil aeration and the resulting enhancement of water permeability. Particular species may also be more prone to Fusarium – especially Annual Meadow Grass (Poa annua). Other contributors like excessive shade from various sources can precipitate unnecessary moisture retention, inviting fungal activity. Recognizing the telltale signs of Fusarium, the brownish or yellowing patches should prompt an assessment of watering practices and drainage efficacy, ensuring effective measures are in place to prevent or combat this persistent lawn adversary.
Long-term Management of Fusarium Patch
Managing Fusarium Patch requires a sustainable, long-term strategy focused not only on immediate symptom relief but also on bolstering turf resilience. Effective long-term management involves a multifaceted approach:
- Scarification: Regular scarification removes thatch and moss, which can choke grass plants and foster fungal growth. This intervention liberates the lawn, enabling greater access to sunlight, air movement, and essential nutrients, all of which can curtail the onset of Fusarium Patch.
- Nutrition: It’s crucial to fertilize the lawn with an appropriate balance of nutrients. High potassium feeds in autumn are particularly beneficial as they strengthen the grass against diseases. By contrast, avoiding excessive nitrogen, especially when disease pressure is high, is essential to discourage the lush growth that Fusarium covets.
- Moisture Control: Dew suppressants and effective water management strategies ensure that surface moisture—Fusarium’s ally—is kept in check. An emphasis on proper drainage, combined with strategic watering practices, helps prevent the conditions that Fusarium Patch favors.
Understanding the Life Cycle of the Fungus
Understanding the life cycle of Fusarium can allow homeowners to combat the disease proactively. This pathogen, causing the dreaded Fusarium Patch, has a preferred temeprature range for proliferation between 12-19°C (54-66°F)—a mild spell that can occur anytime from late summer through winter.
The infectious cycle often unfurls at night, when temperatures dip to 0-10°C. Paired with leaf-wetness, these conditions are prime for Fusarium. Further, snow mould forms during spells in winter beneath snow cover, presenting an excellent environment for the fungus’s growth.
Regular Lawn Inspections and Monitoring
Vigilance is vital to detect Fusarium Patch early. Regularly canvassing the lawn can reveal suspicious yellow patches, which can swiftly turn brown if Fusarium is at play. During wet conditions, the appearance of white or pink cottony fungal growth is a red flag that demands attention.
Alongside visual inspections, adopting robust cultivation practices such as aeration to alleviate soil compaction and improve drainage forms a cornerstone of regular maintenance. These practices, along with a cautious approach to nitrogen fertilizer application, especially in late summer and autumn, are crucial to keeping Fusarium at bay.
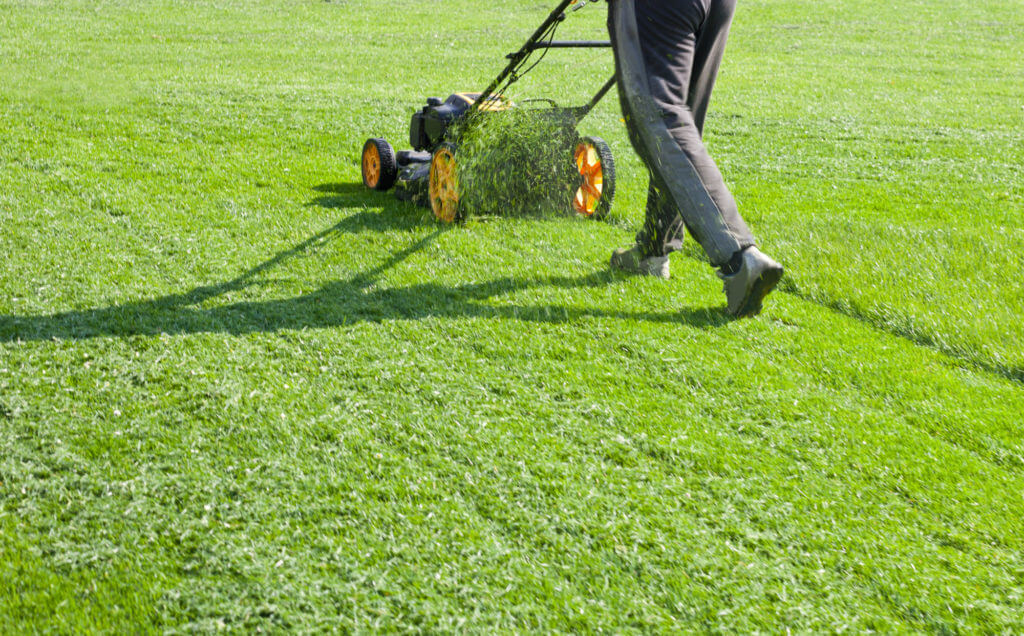